Every build is a little different but this is how i took the design through to build for a road bike.
This is the final design.:


Phil_Adkins_fast-road-final_A0_landscape
Once i get the drawing i like to double check the dimensions and angles. I also lay the tube set out to make sure the tubes are suitable and the dropouts are the right angle and I have all the small parts (bottle mounts etc).
Next Mark the tubes to check the butting and make notch cuts and mitres.
Firstly time to check the butting to see where best to cut. I have left the seat tube butt relatively long so the frame can take some power and not flex laterally to much.
Then drill the bb for venting and removes a bit of weight. then to stamp the bottom bracket: 7-pip-13 (number 7 frame – customers name/initial – year:
then its time to make a notch cut:
hand finish the joint. then check the angle is square:
![20131011_202034[1]](https://levybikes.com/wp-content/uploads/2013/10/20131011_2020341.jpg)
check the set up:
![20131011_205800[1]](https://levybikes.com/wp-content/uploads/2013/10/20131011_2058001.jpg)
Flux and weigh down before tacking:
![20131011_210357[1]](https://levybikes.com/wp-content/uploads/2013/10/20131011_2103571.jpg)
Check the angle then wet in the joint then pit down a small fillet.
![20131011_213309[1]](https://levybikes.com/wp-content/uploads/2013/10/20131011_2133091.jpg)
Then clean up with boiling water and wire brush to re check the join and that its square:

Head tube down tube joint is pretty much the most important on the bike. If it’s not straight your bike will veer to one side. If it’s not set and the right angle the handling will be poor. If it’s week or poorly welded you may need dental surgery. So it always a best to pay special attention to this joint in this case a Columbus 36mm head tube with reinforced top and bottom brazed on and 34.9mm Columbus Spirit down tube.
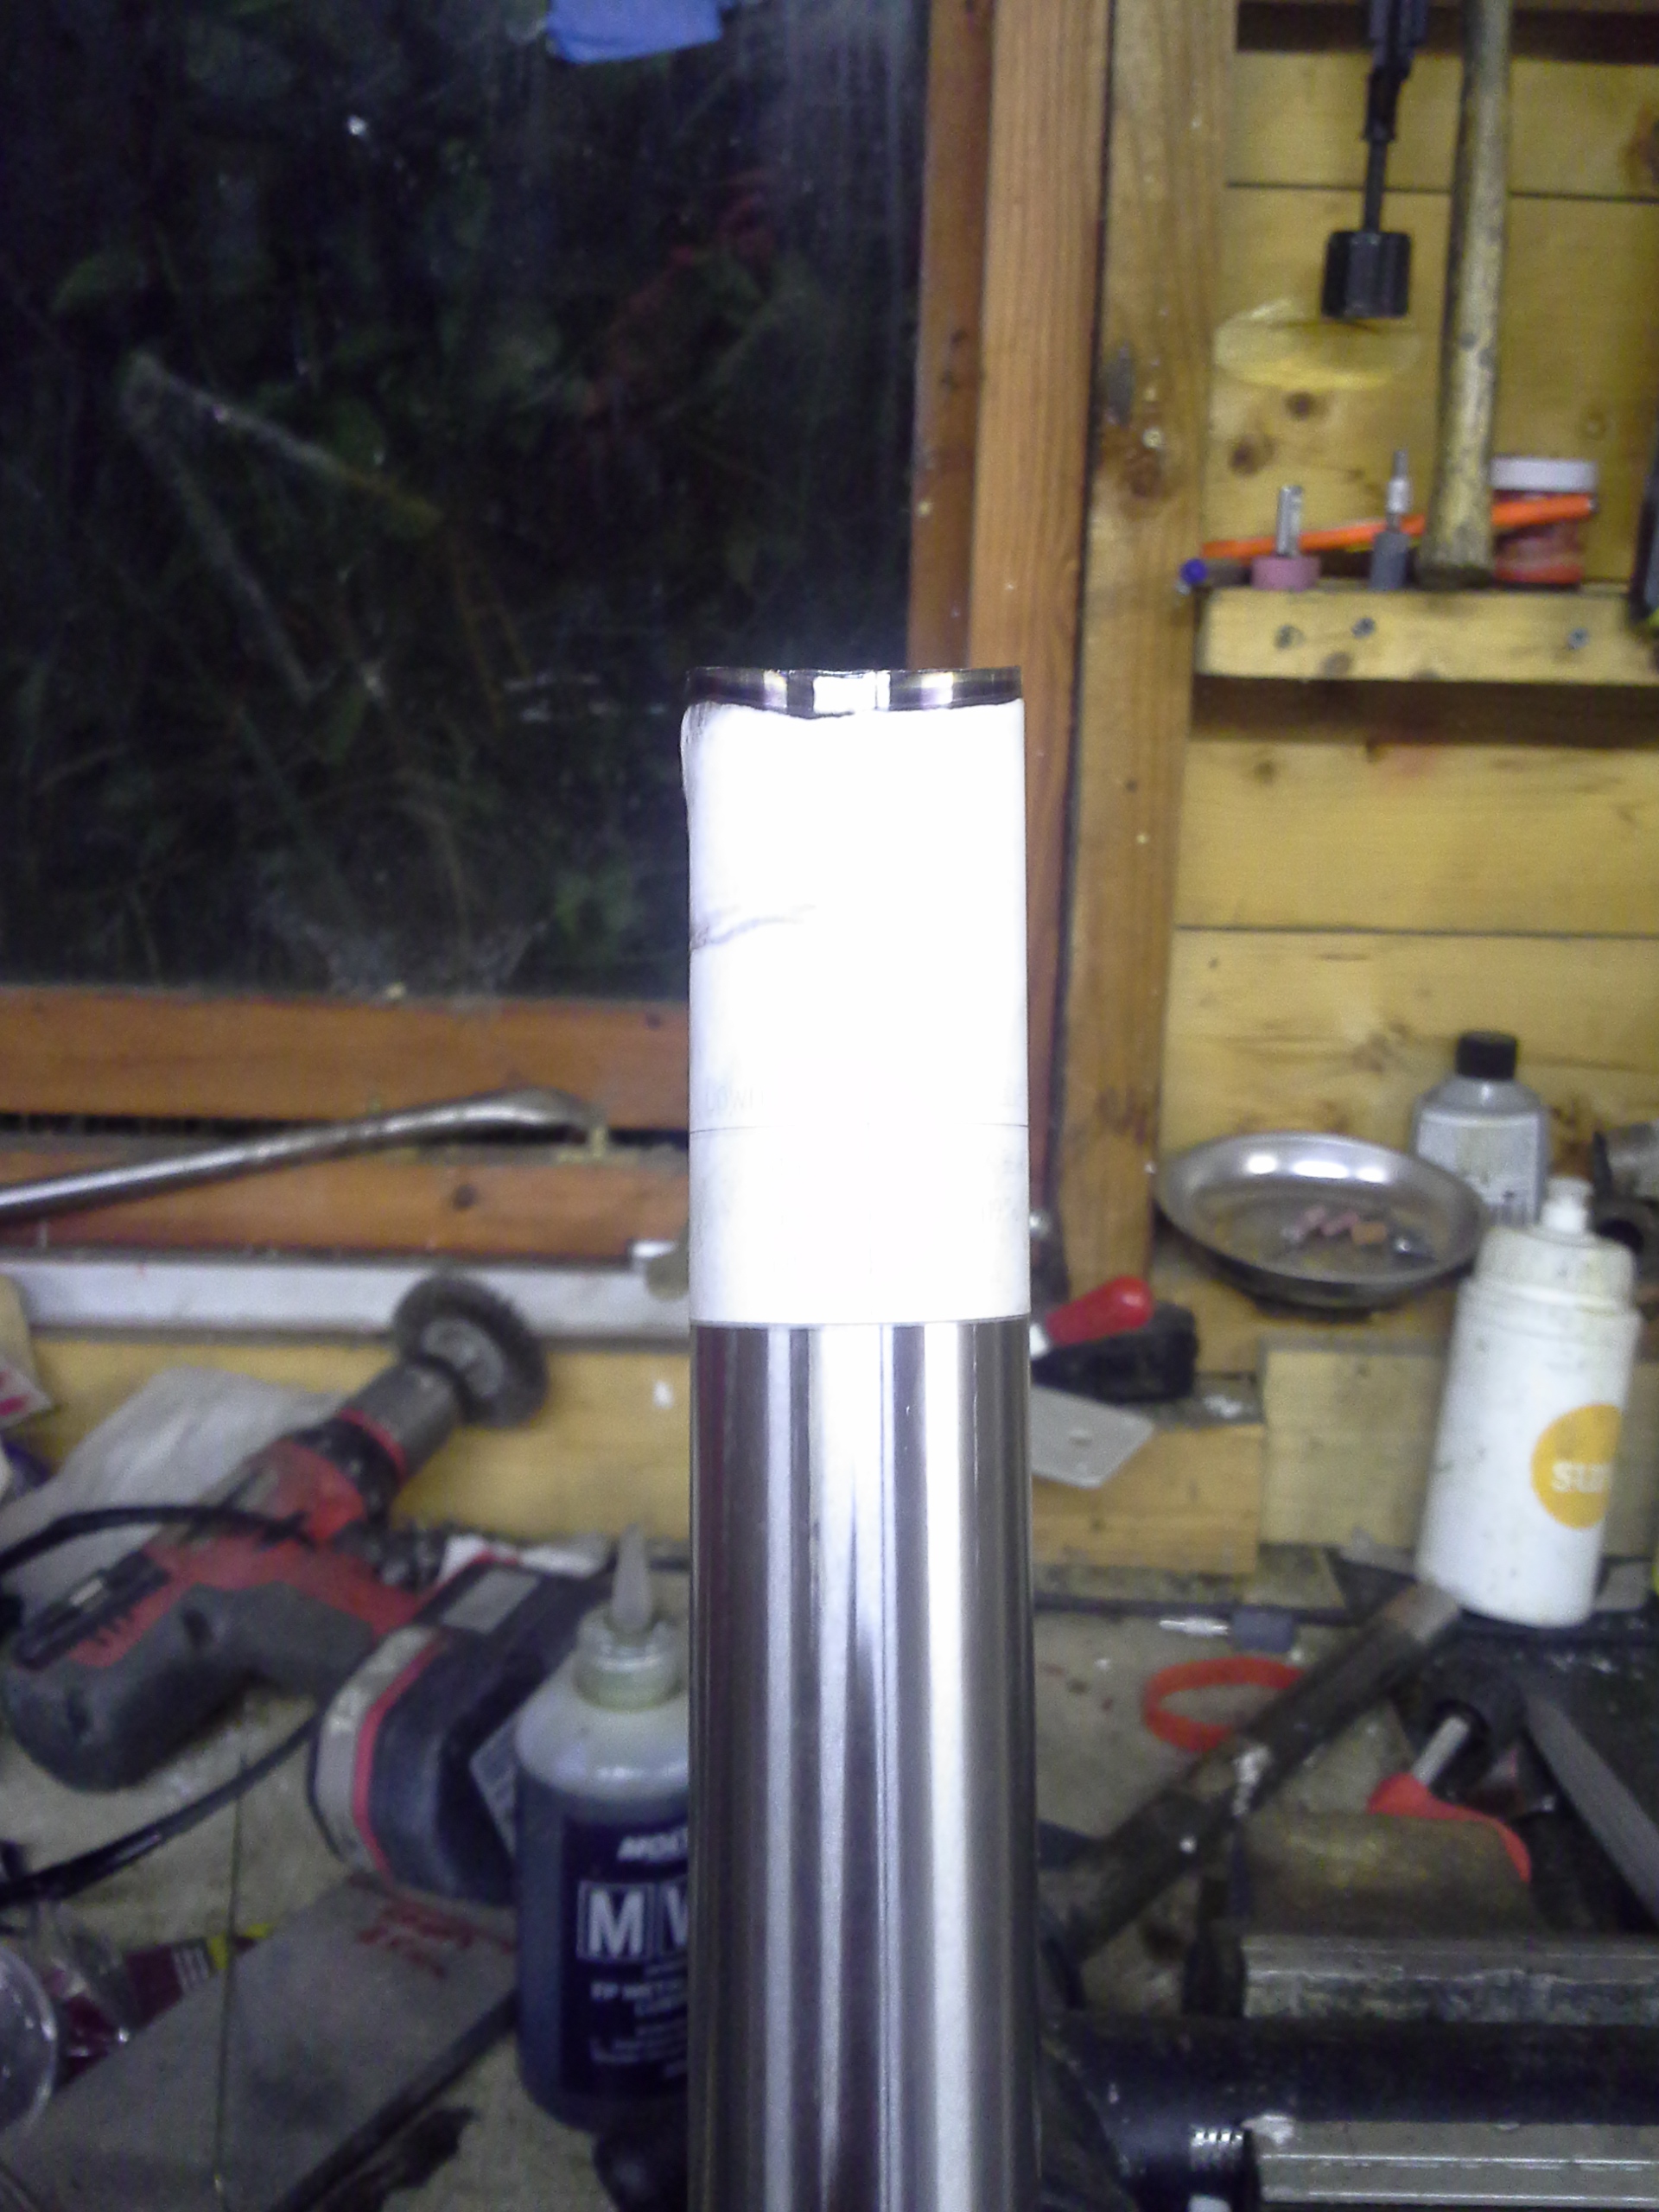
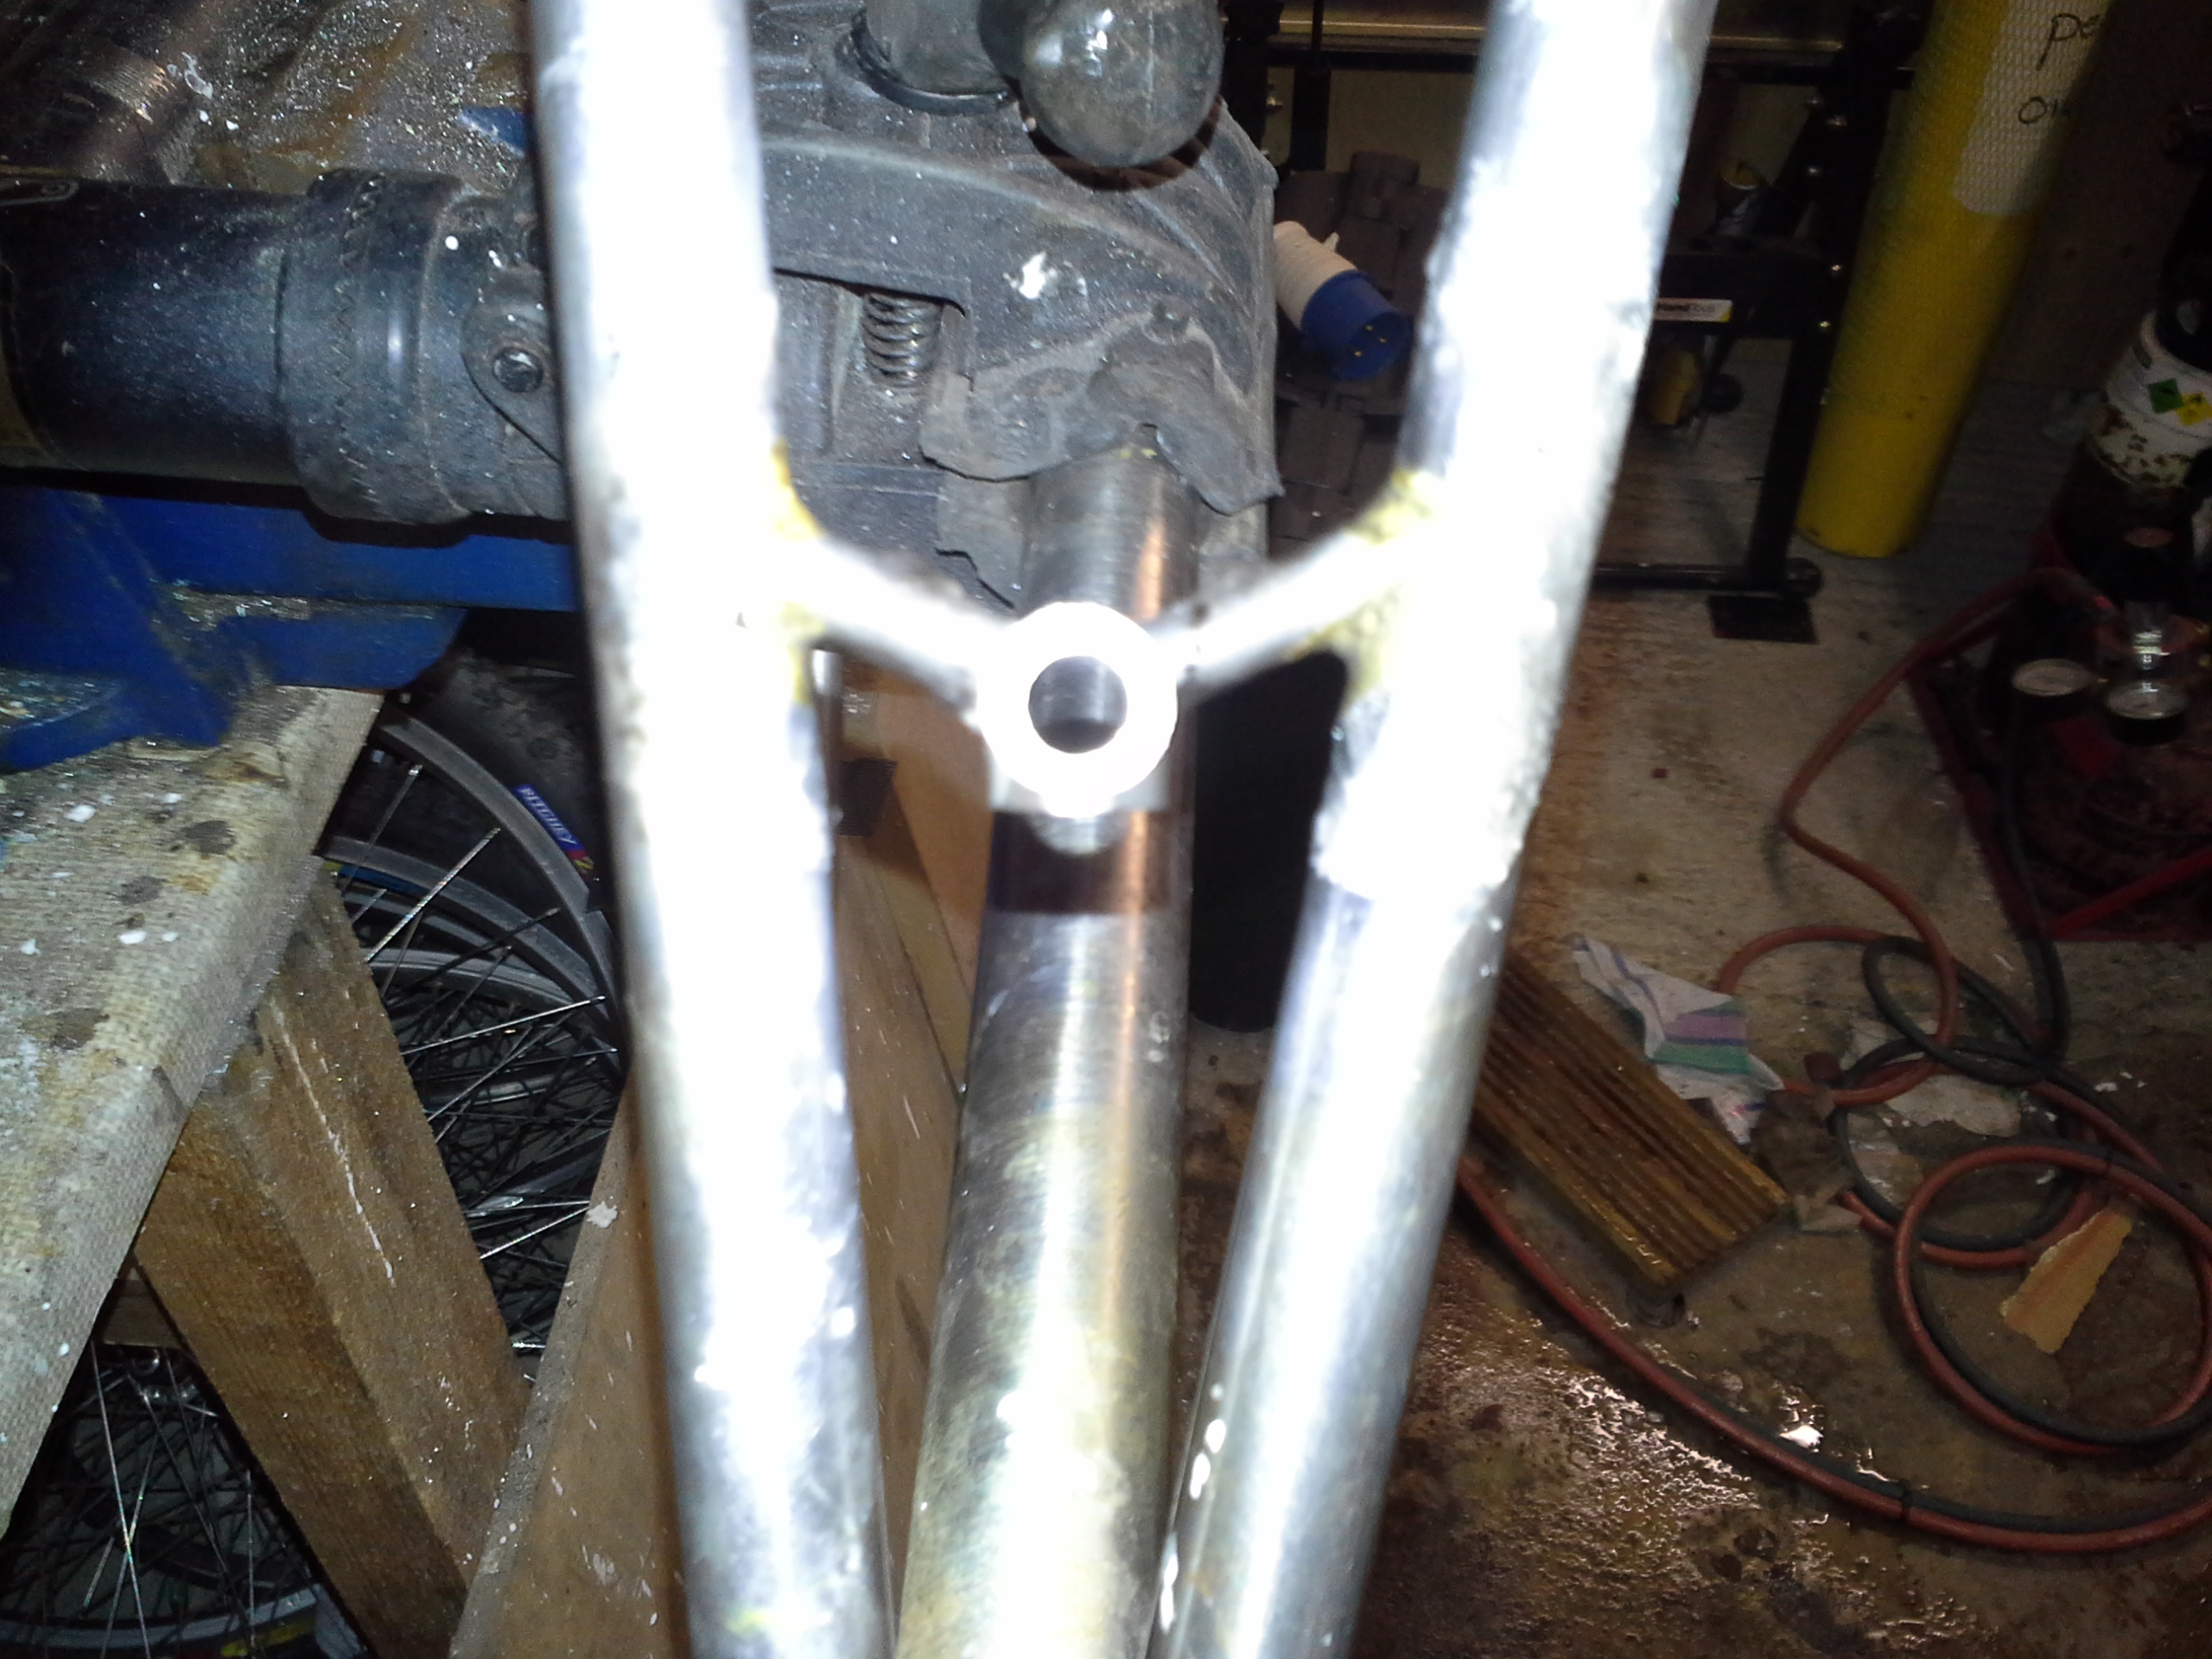
First job is to cut the head tube to length then braze on the reinforcements and tidy up. With the reinforcement they are 3mm longer but that fine as I will ream them down when I ream the headstock. Then Drill and breathing hole, I have gone for a 13mm to save a bit of weight.

Next to mitre the head tube. You could use a tube notcher for this but a 36mm bit seem to be rare or over £100 to buy. So I am going to old school it with a paper template and a hand file.
Cut the template out and tape it to the tube draw round it. Then cut the bulk out with a hack saw and a bench grinder. Then its time to get the 8* half round second cut file out.
Take your time to get this right. Check the angle with a digital t angle finder. I am looking for 60.2 degrees +/- 0.2.
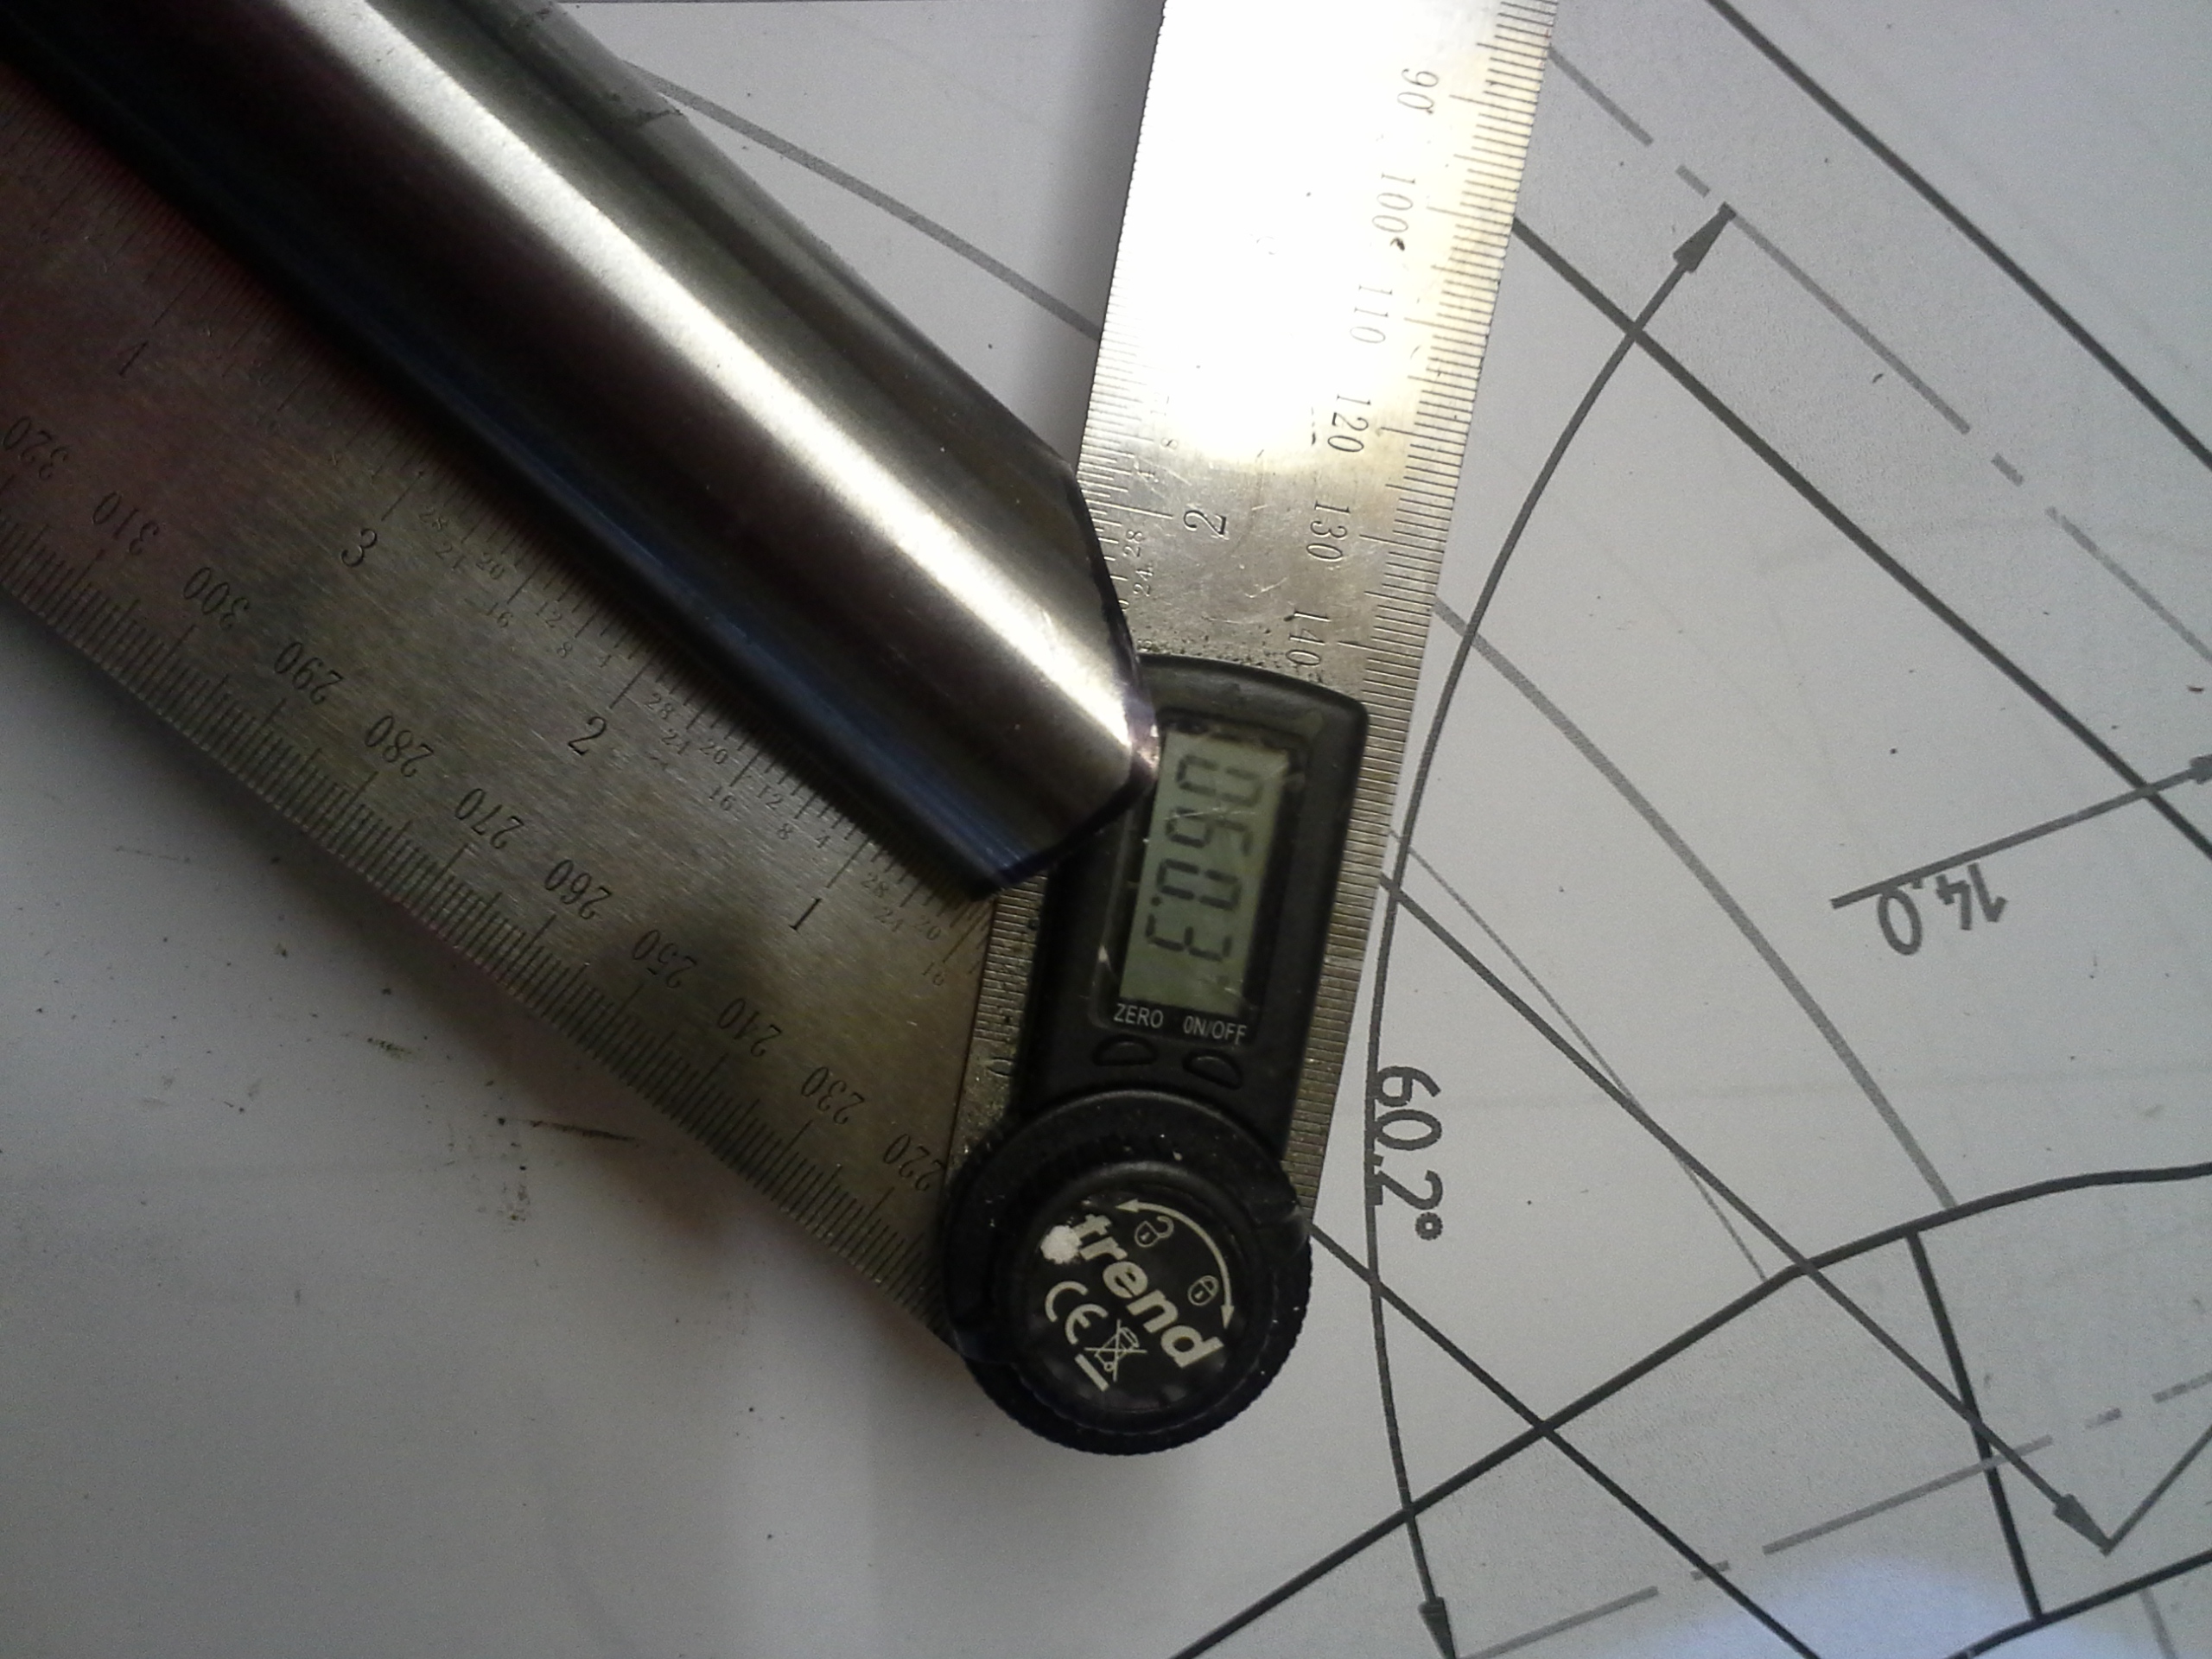
the fit has to be near perfect. ideally if you put a piece of paper between the tubes and pressed you should get a mark the whole way round. if you are TIG welding you can be a little less fussy but with brazing you want it spot on even if you are using stronger braze (sif no.2 5% nickle) its still good practice and alloys you to use a smaller fillet (4x tube thickness so a 4mm radius in this case. I will probably go a little thicker to give margin of error.
Then you need to get it on the full size drawing to double check. it all looks good, but note even with a good brazing technique you will change the angle as you braze. More about that next time. Its late now so I am not going to start brazing so that will have to wait until next time.

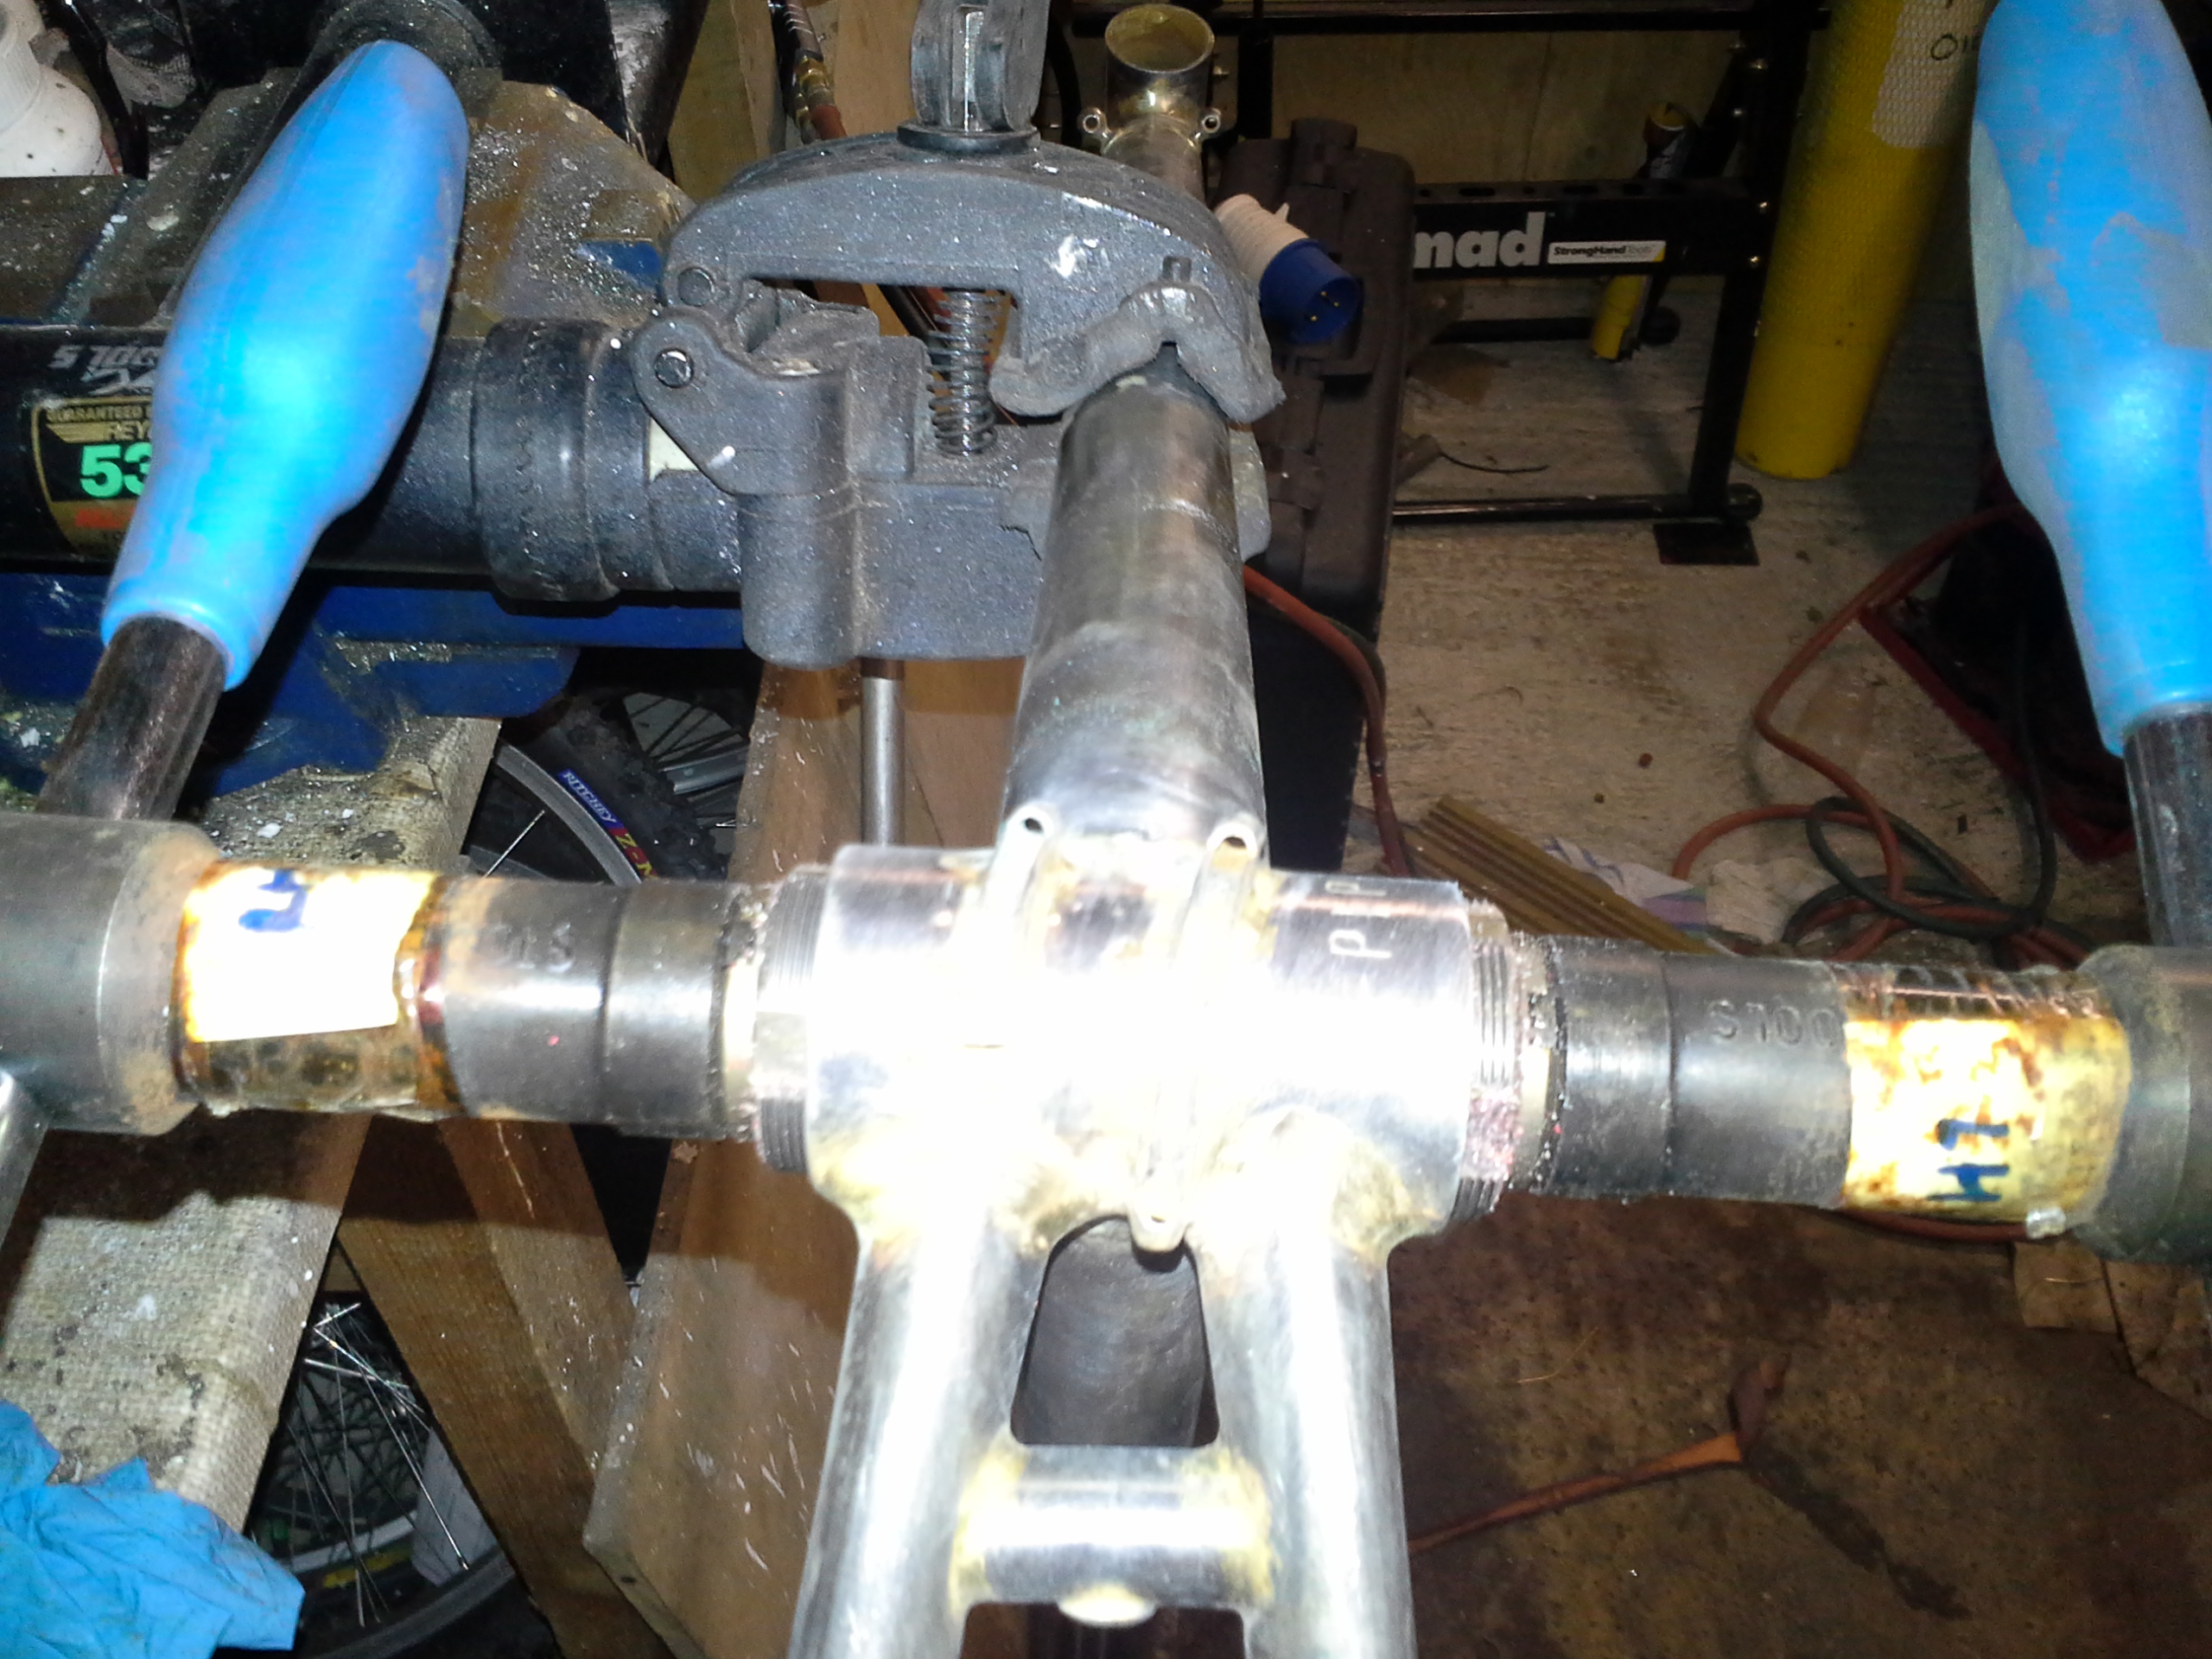
Right now it’s time to do the most important joint, head tube down tube. The angle has been check on both the angle and on the drawing. Then you need to set up the joint and weight it and flux it.

Then 4 tacks at 12,3,6,9 o’clock.
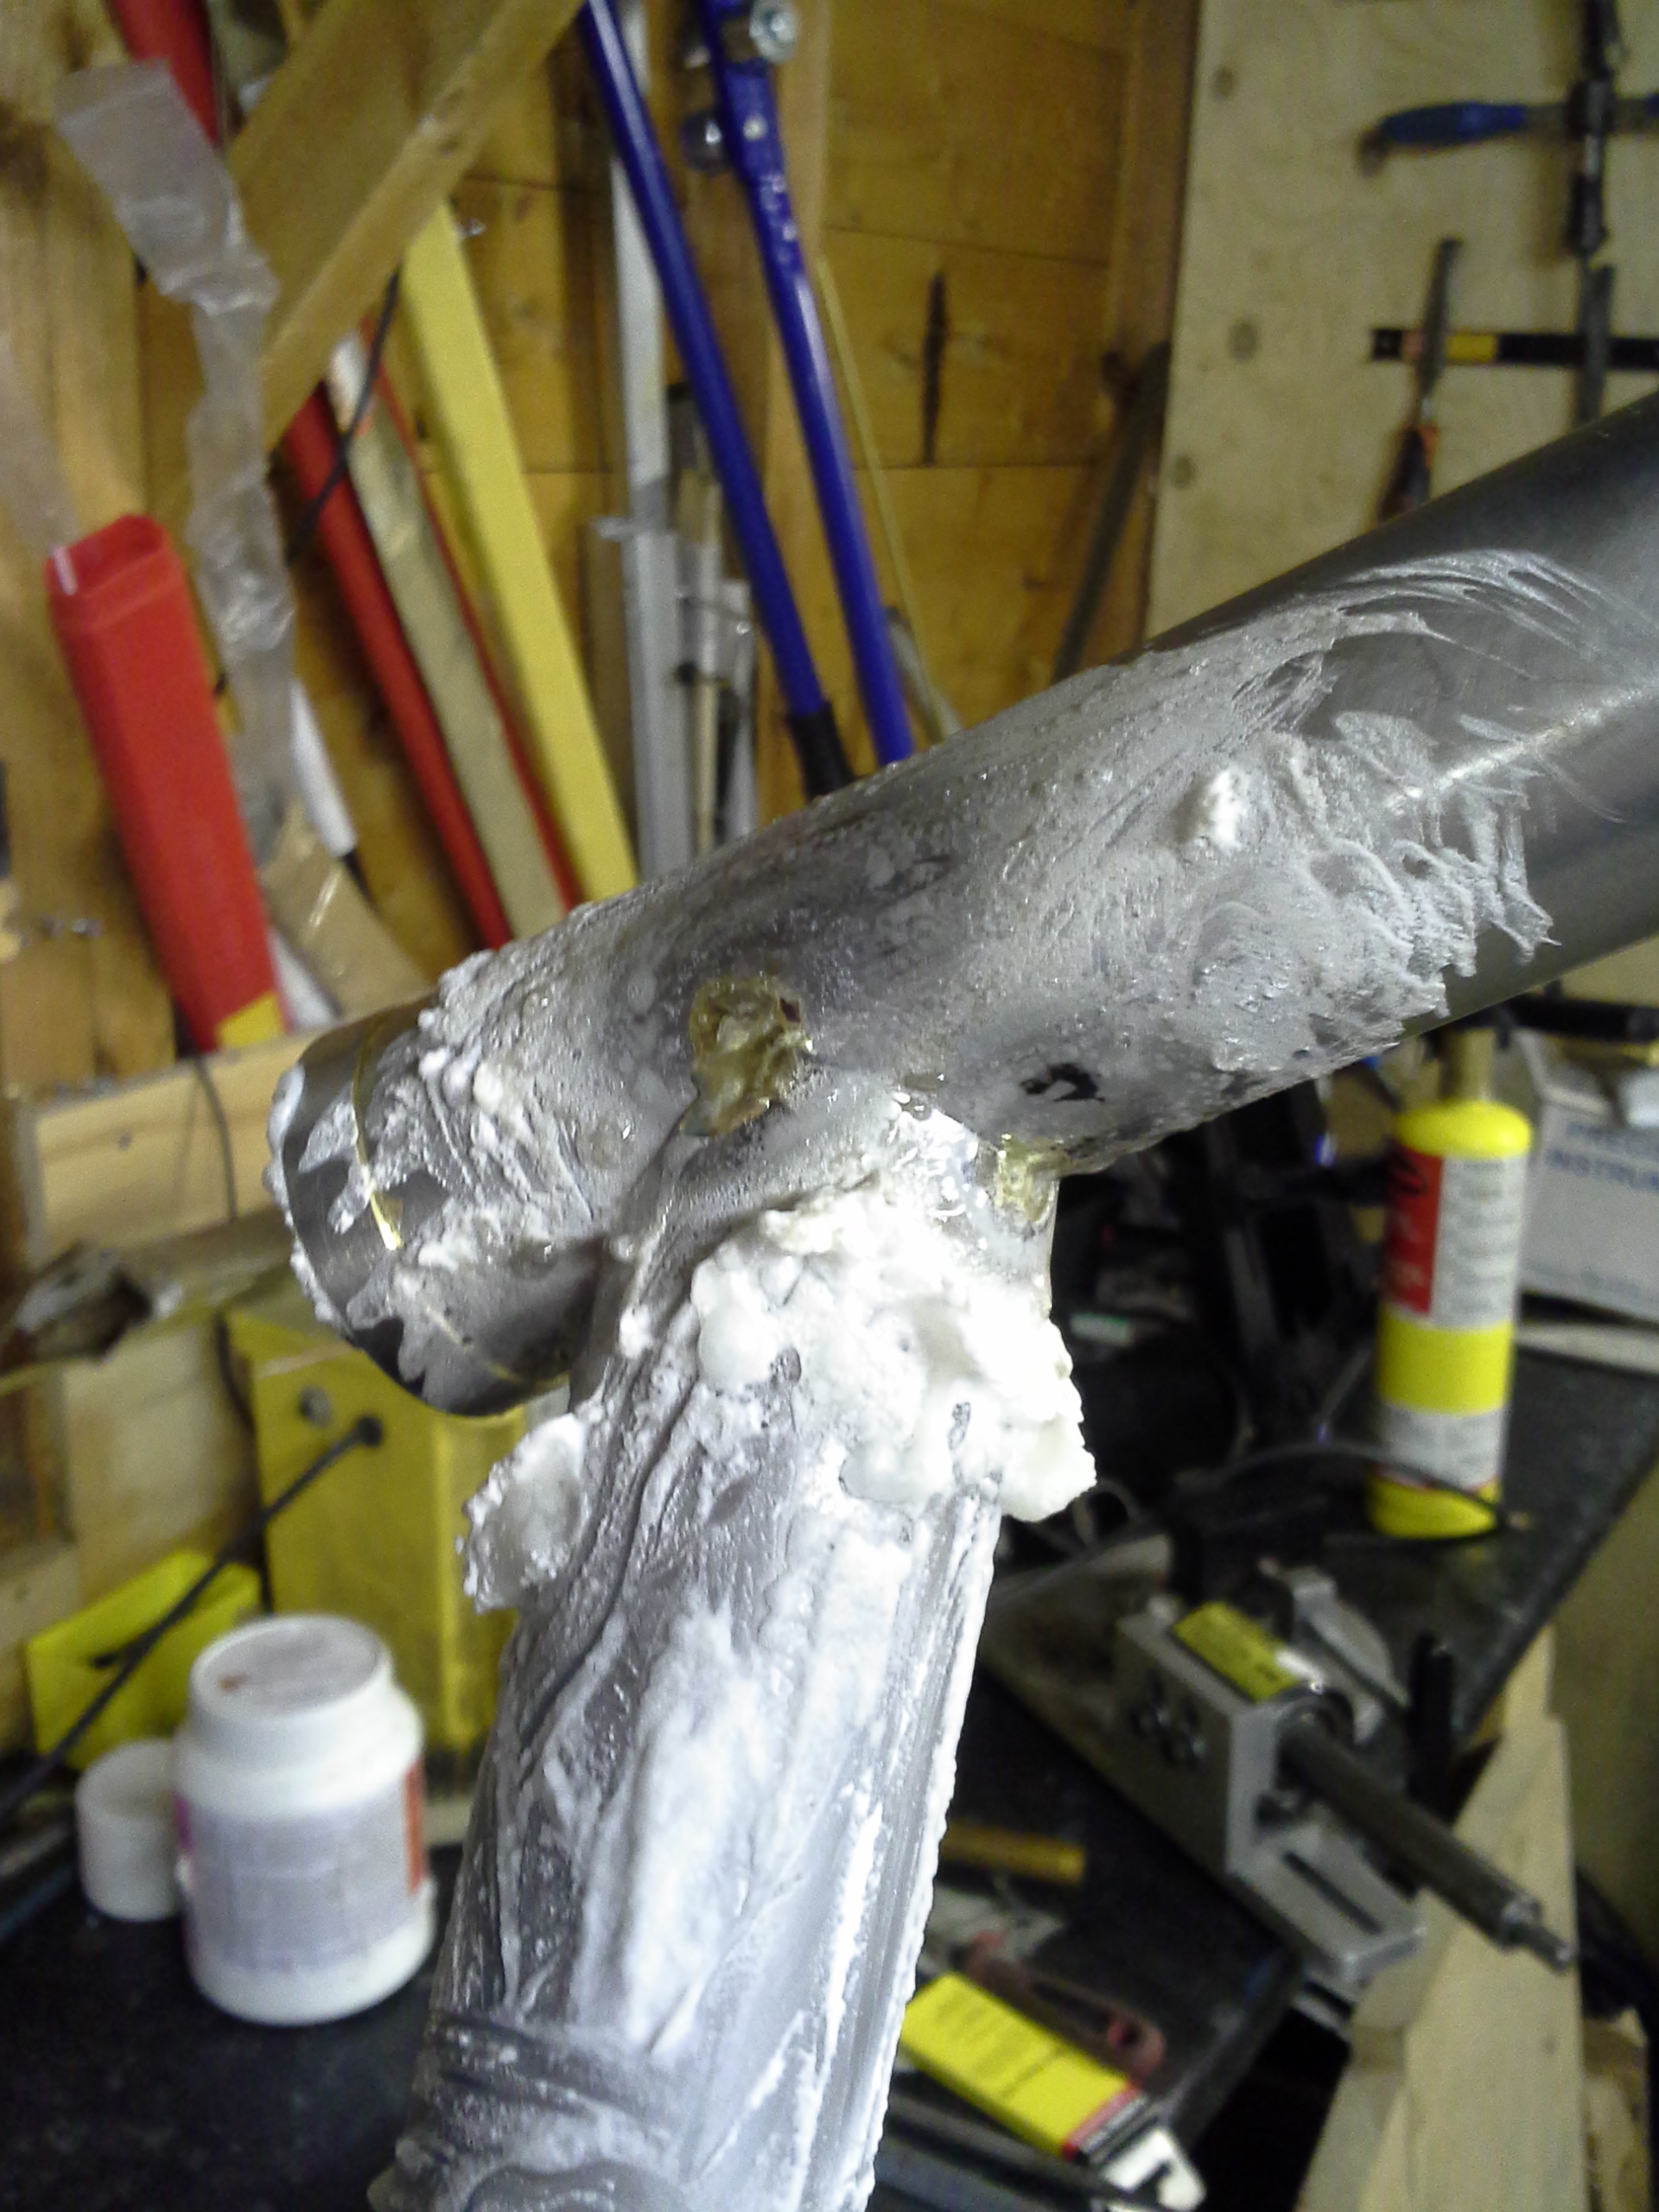
Then check the angle again:
then warm the whole joint to stop warping then wet the joint and check the angle again. Then finish the joint from 8-4o’clock and 10 to 2 o’clock, then 8 to 10 o’clock and 4 to 2 o’clock. you can add a little more filletto the joitn to pull it slightly in that directon until you can see its spot on angle. Then stick in hot water for 30 mins scrub the flux off and tidy up.
![20131022_202252[1]](https://levybikes.com/wp-content/uploads/2013/10/20131022_2022521.jpg)
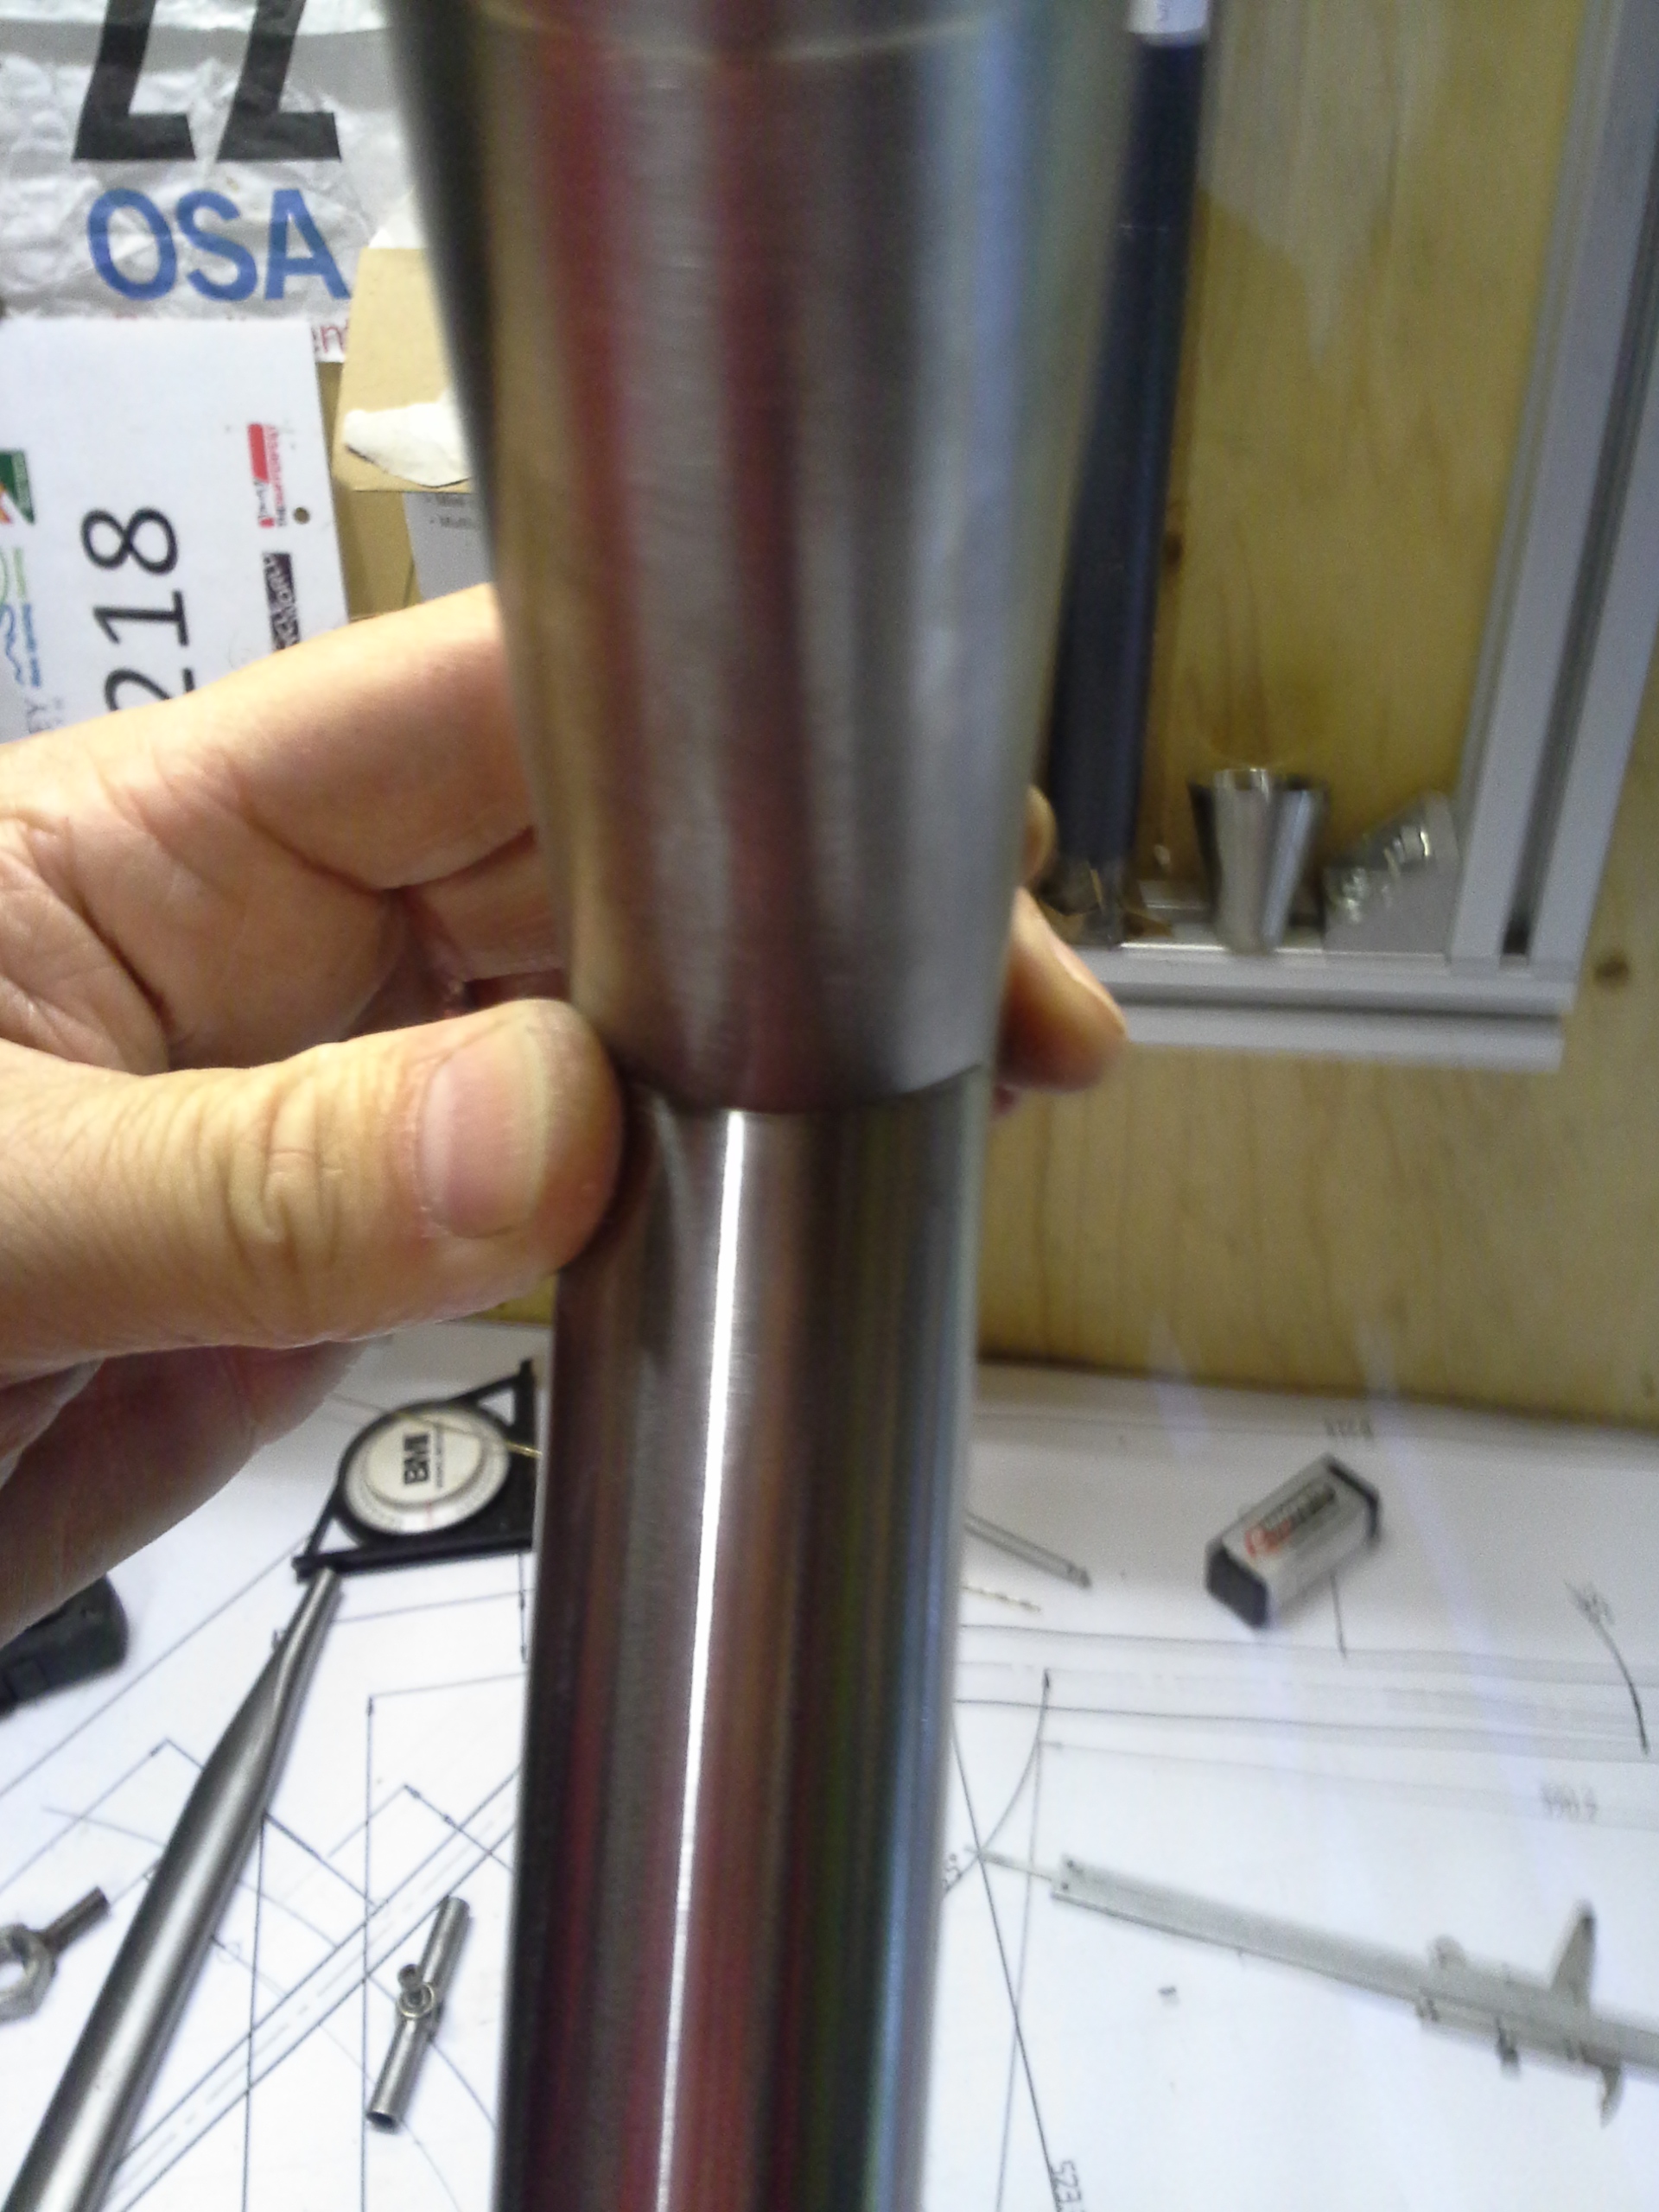
Still square and a pretty tidy joint :¬)
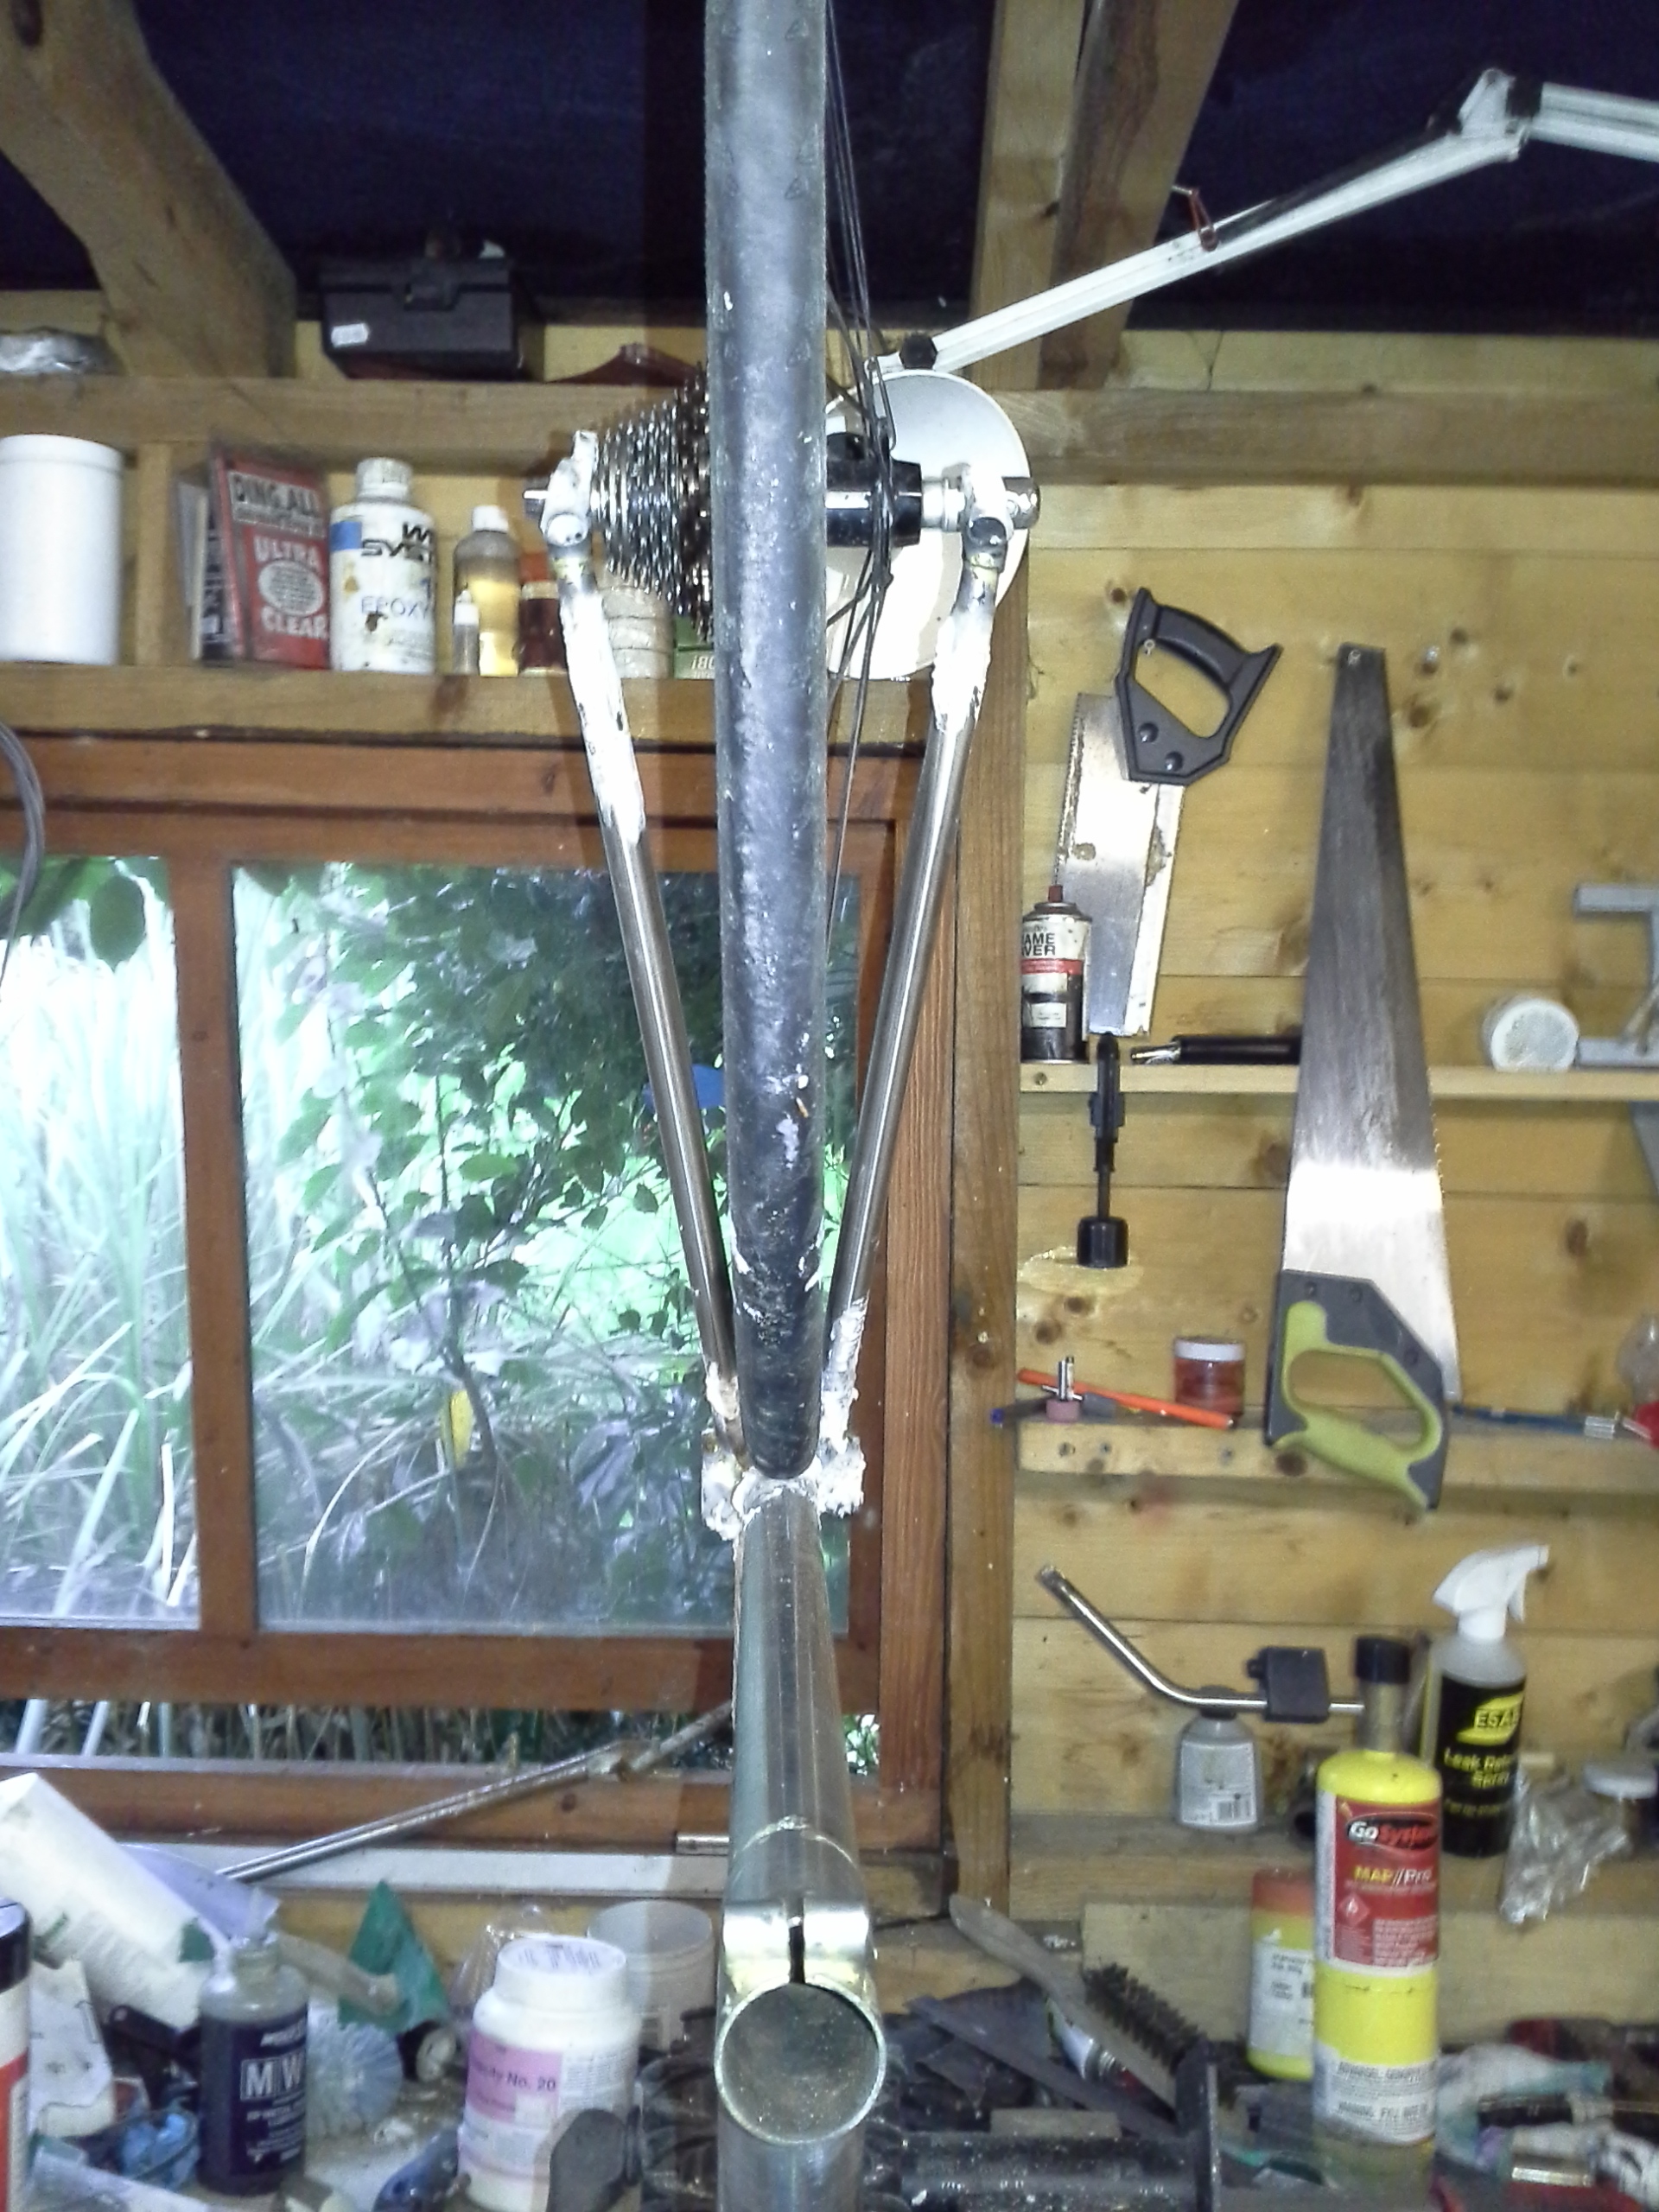
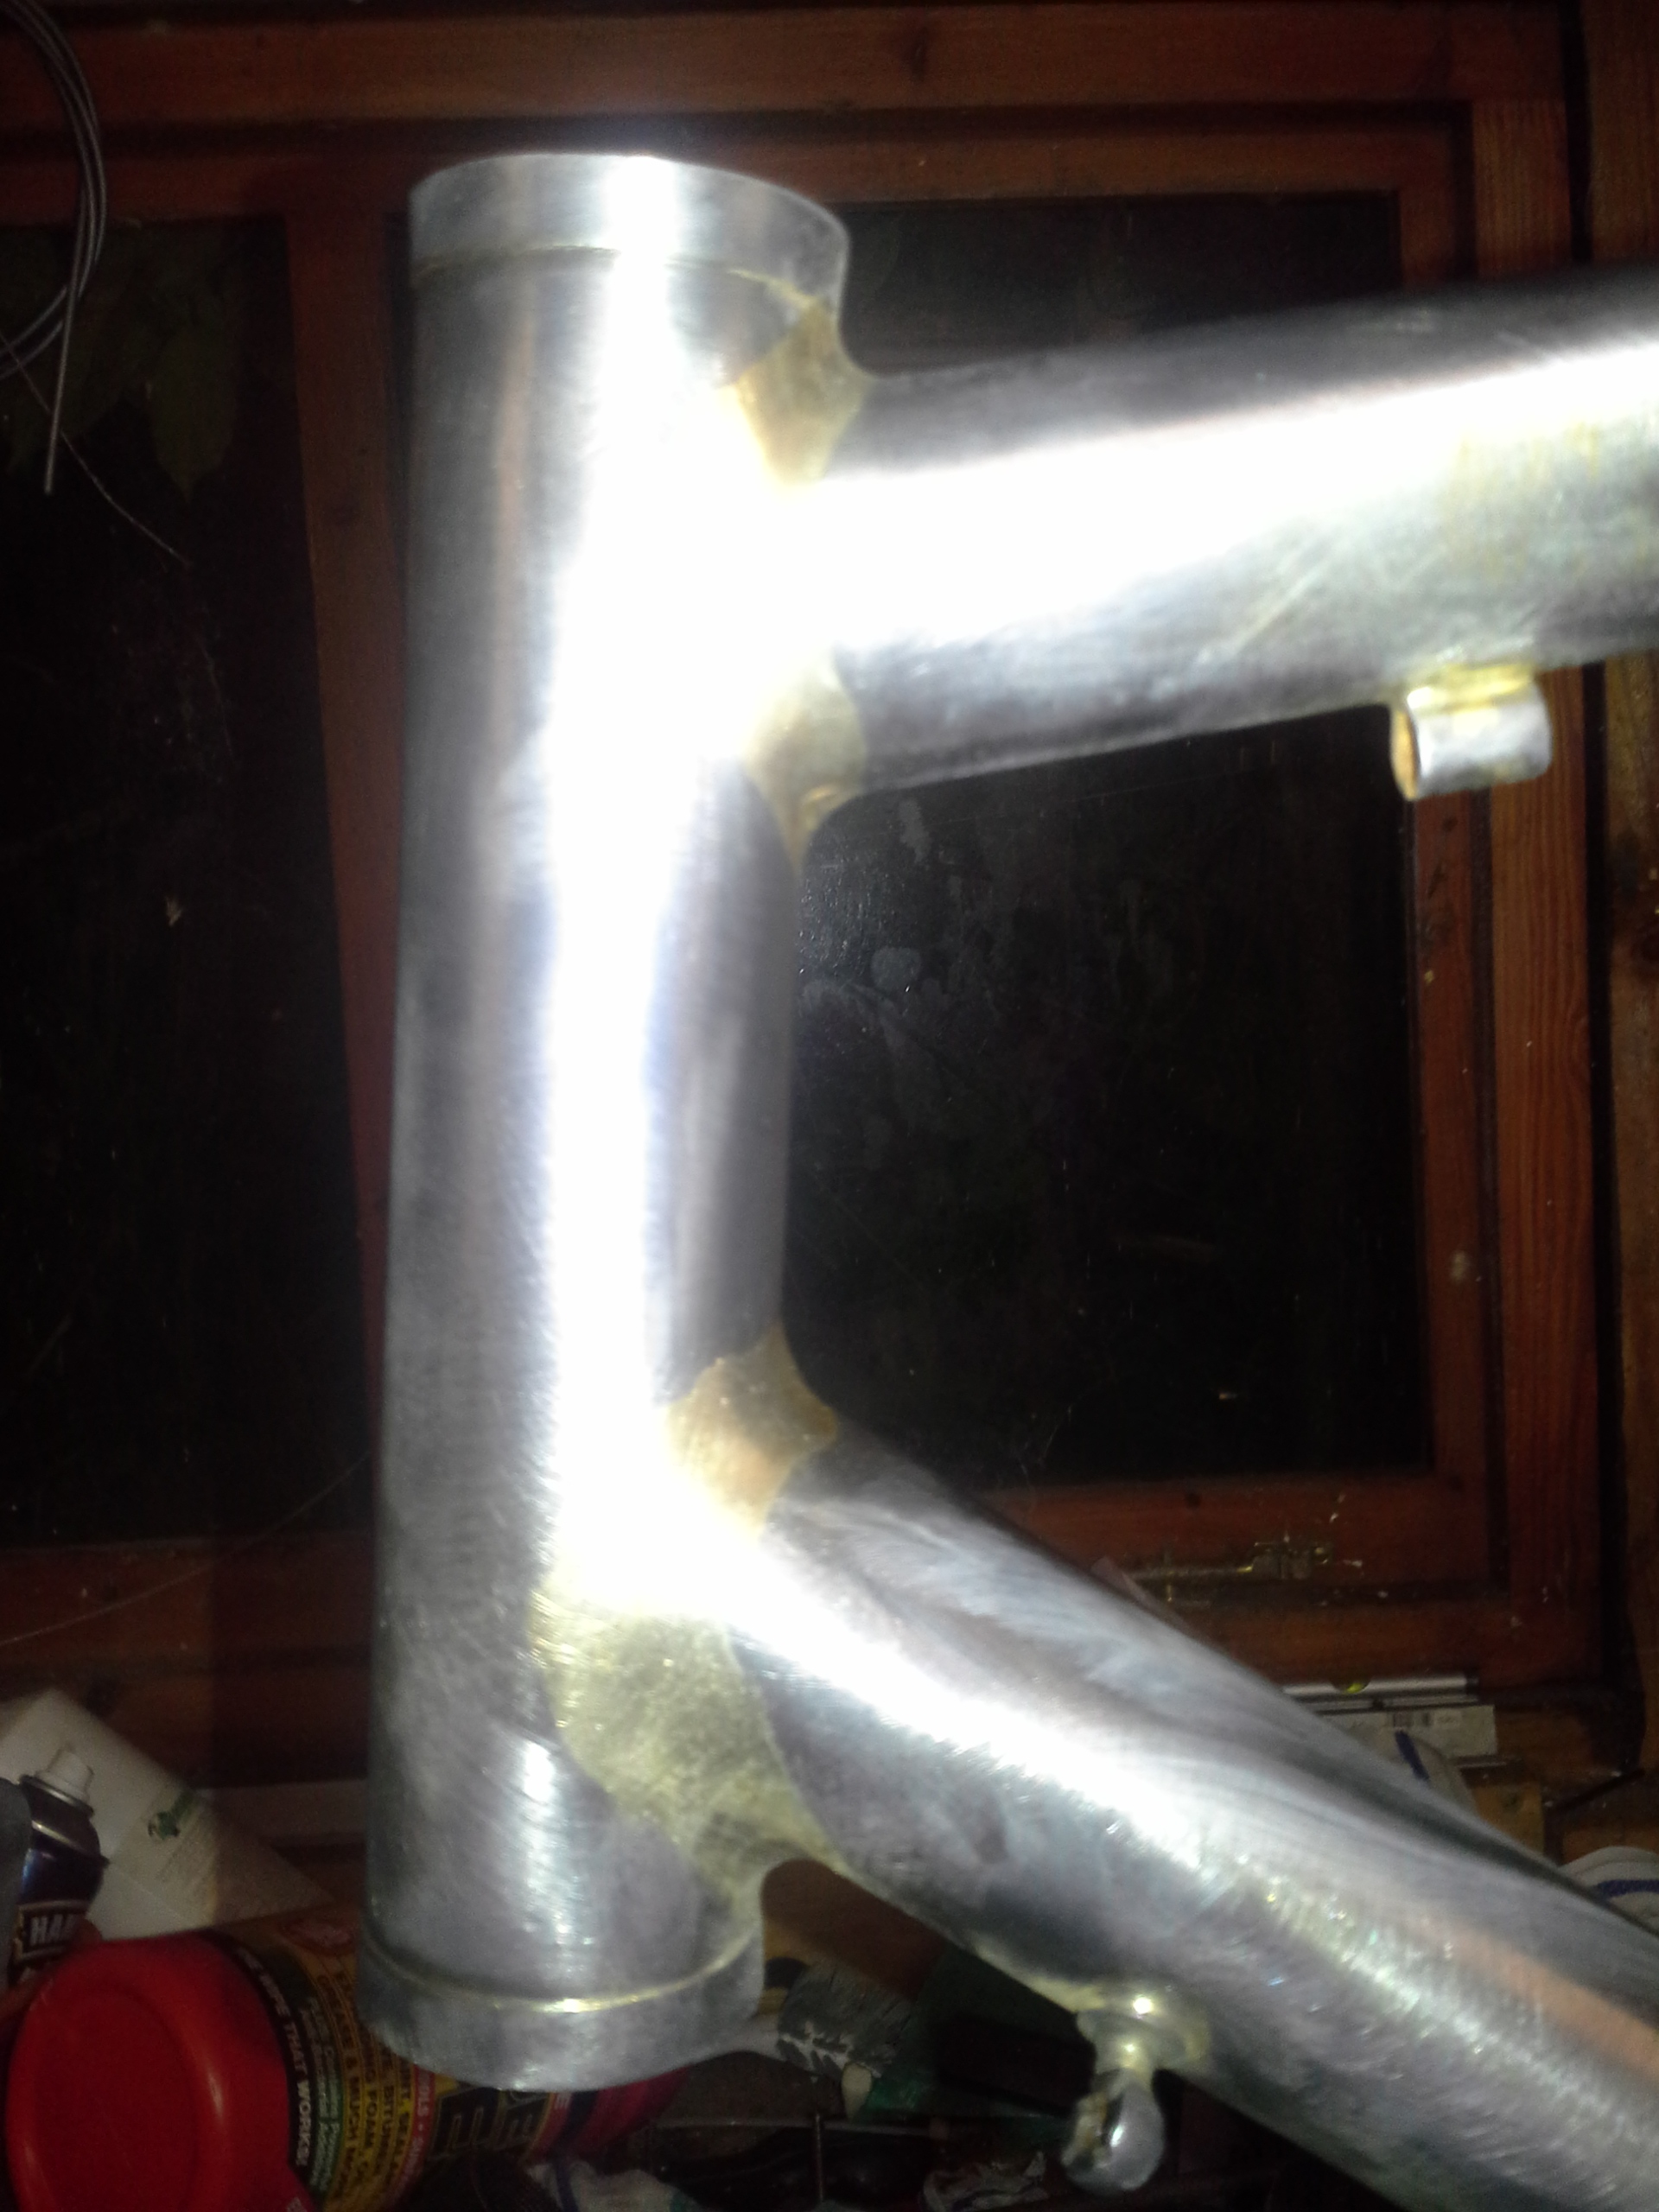
The next joint is the bottom bracket down tube. This is a 2 way mitre one longitudinally across the bottom bracket shell. The other is where to the down tube meets the seat tube.
![20131022_220955[1]](https://levybikes.com/wp-content/uploads/2013/10/20131022_2209551.jpg)
Time to take a brake. line up and tacking next time.
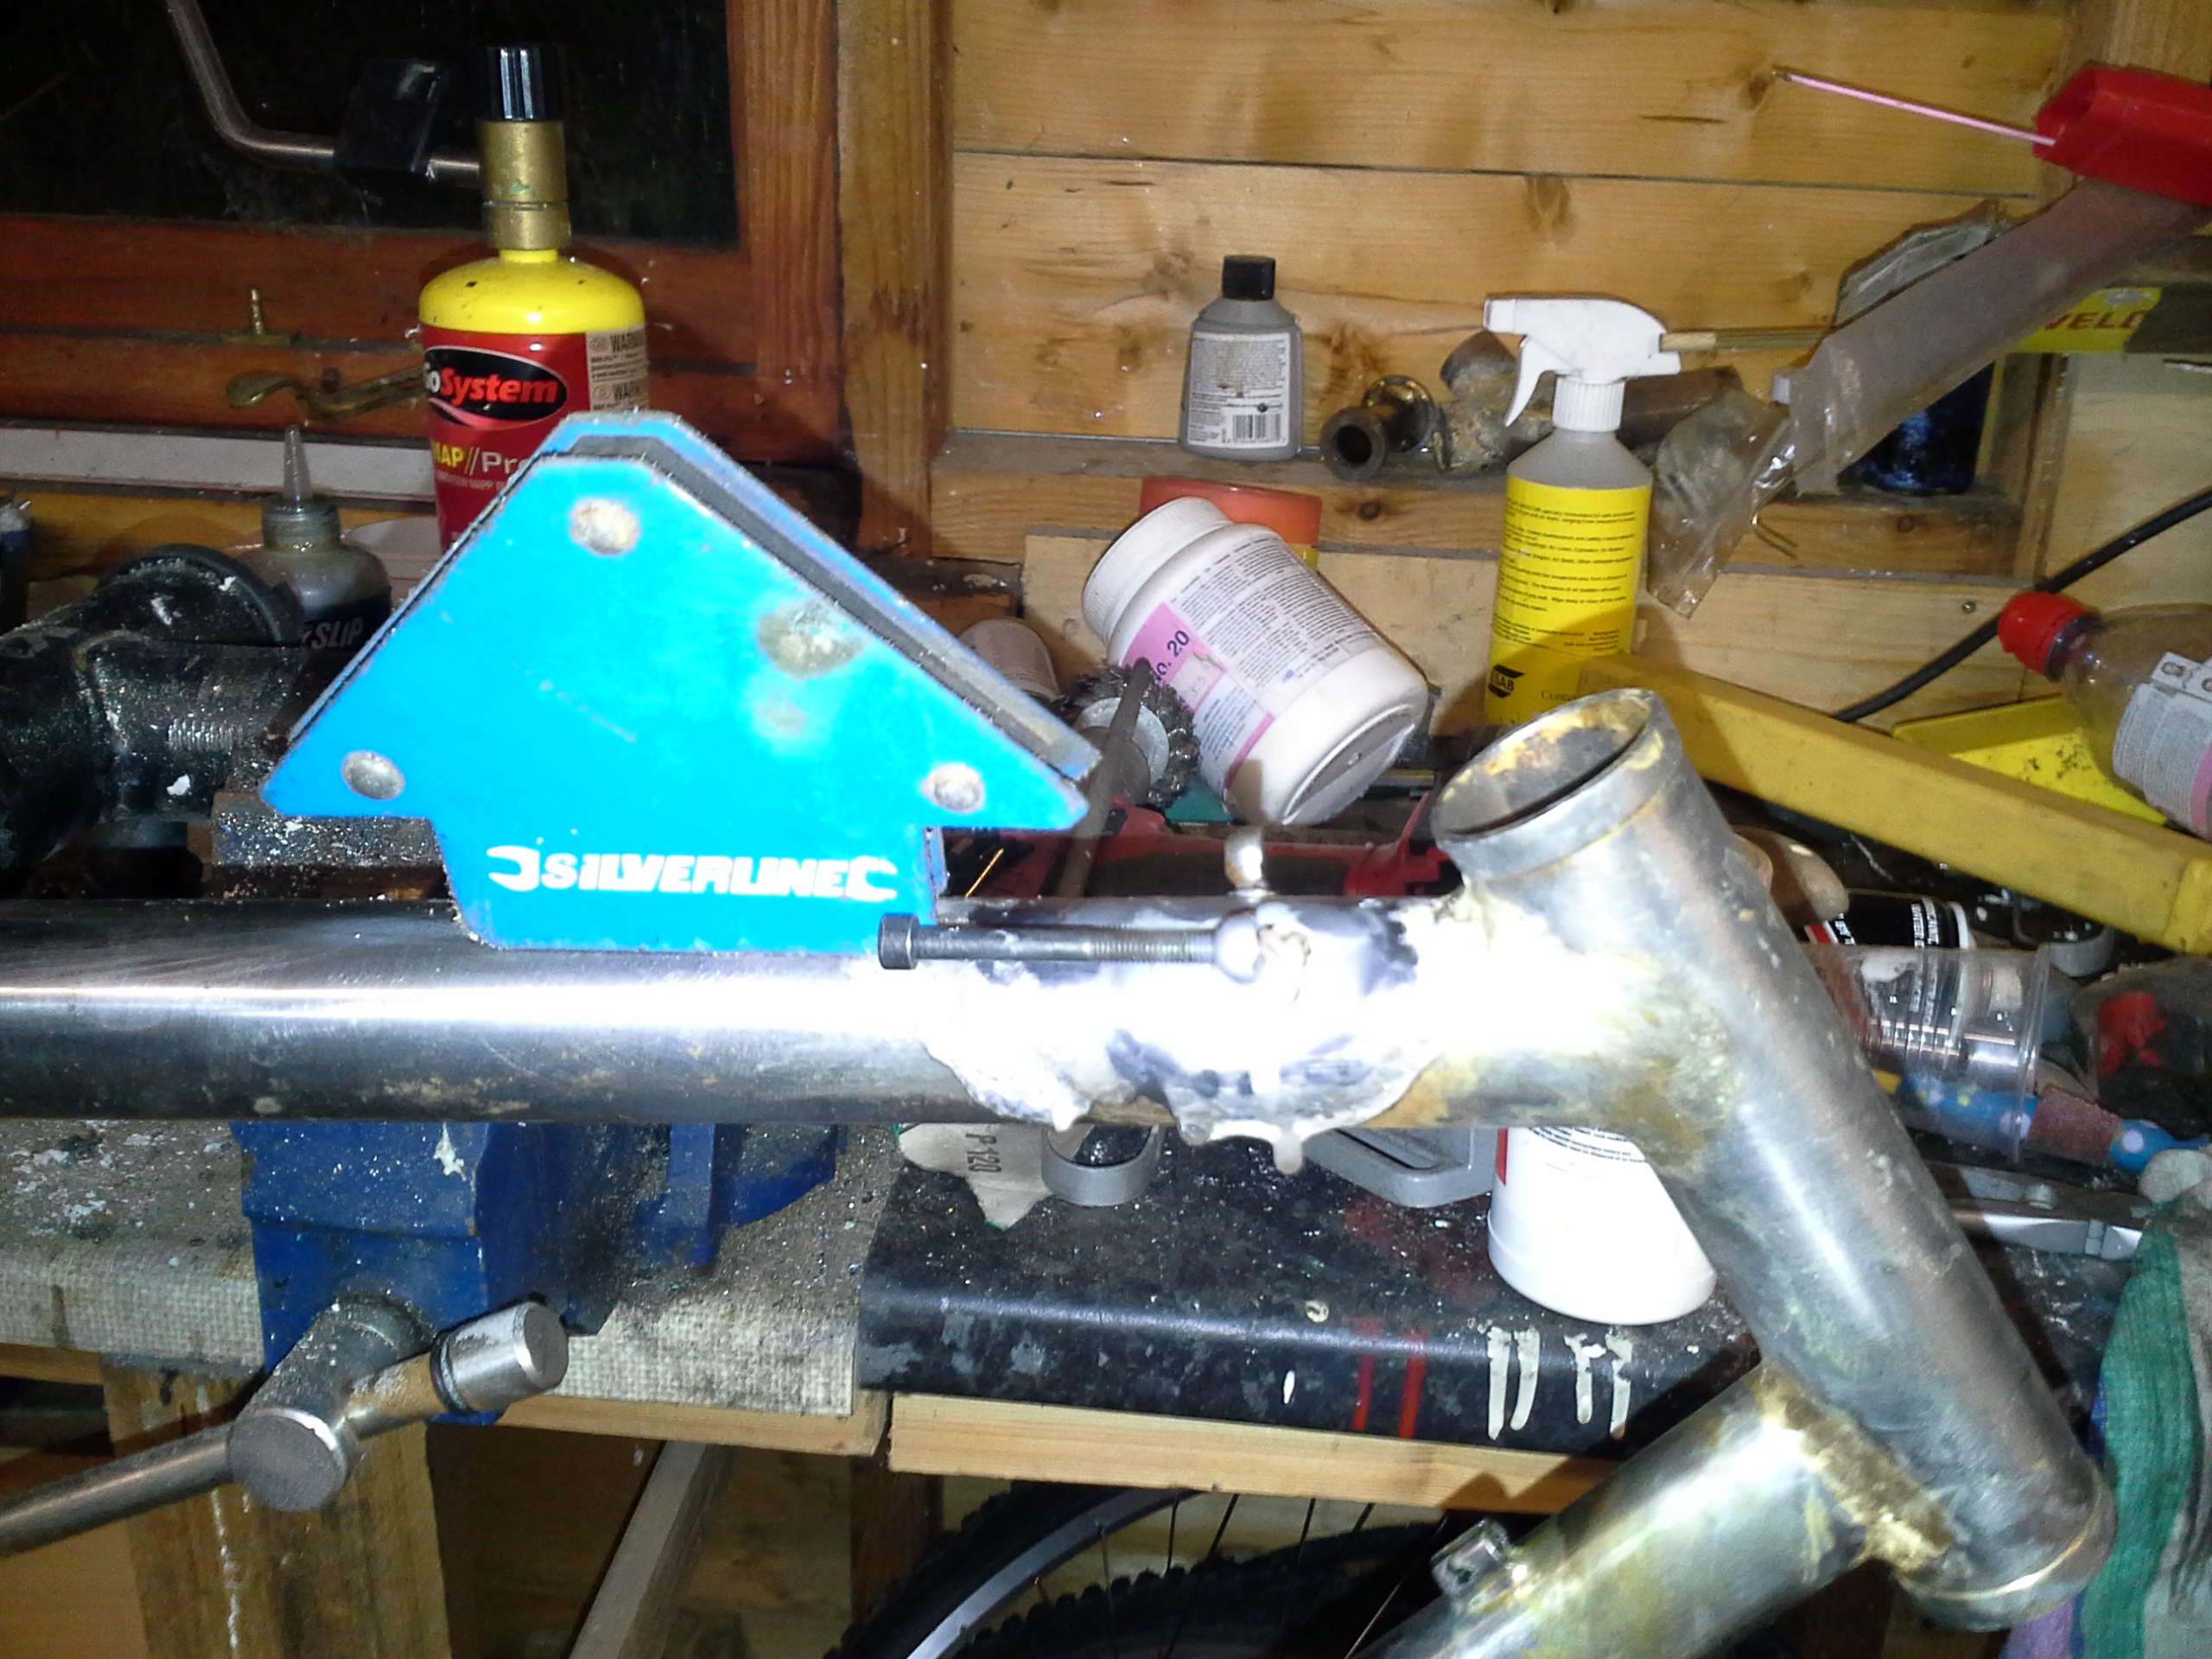
Right BB joint time. The Mite has been checked:
The preparation it sand the outside and inside of the frame. The wipe down with Propanol. The bottom bracket needs a 15mm vent hole. then its time to set it up on the bench to get it square slide it all half off the bench so there is room the weld and tack it and check it. Then get the whole joint warm then wet it in outside to inside, then check it.

All square. The seat tube needs re-enforcing 0.8mm tube silver soldered to the seat tube.So the total thickness is 1.8mm which should do but not be to much extra weight.it can be cut to lenght after.

The top tube can now be mitred ready to tack next time.

Right its time to put in the top tube. It’s all been mitered and is set up with resting on the tube clamps as per the drawing. then its time to tack it and check it:

The oval top tube looks good even though the joint is not finished yet.

Then its checked against the drawing. then i put it in the jig so i can set up the rear end.

Checking the other full scale frame drawing for the chain stays. I can measure the chain stay angle (8.5*).
Because the are Columbus Spirit chain stays they are flared and ovalised i can’t use a tube mitre program so the tube notcher is out again.

When both are are done it time to fit up on the jig to check they are the same length.

It’s best to do one side at a time with a couple of small tacks to see if it’s square.

On the plan its square in the plan view but not on its side. Dam. that’s why you tack and check. So brake those tacks and adjust the jig by 4 mm and do it all again.
The quickest way to get the other chain stay on is to use a dummy axle set to 132 (+2 mm of the final axle width as the bridge will pull it together). tacked and time to check with a real wheel.
Bang on sorted. Seat stays next.
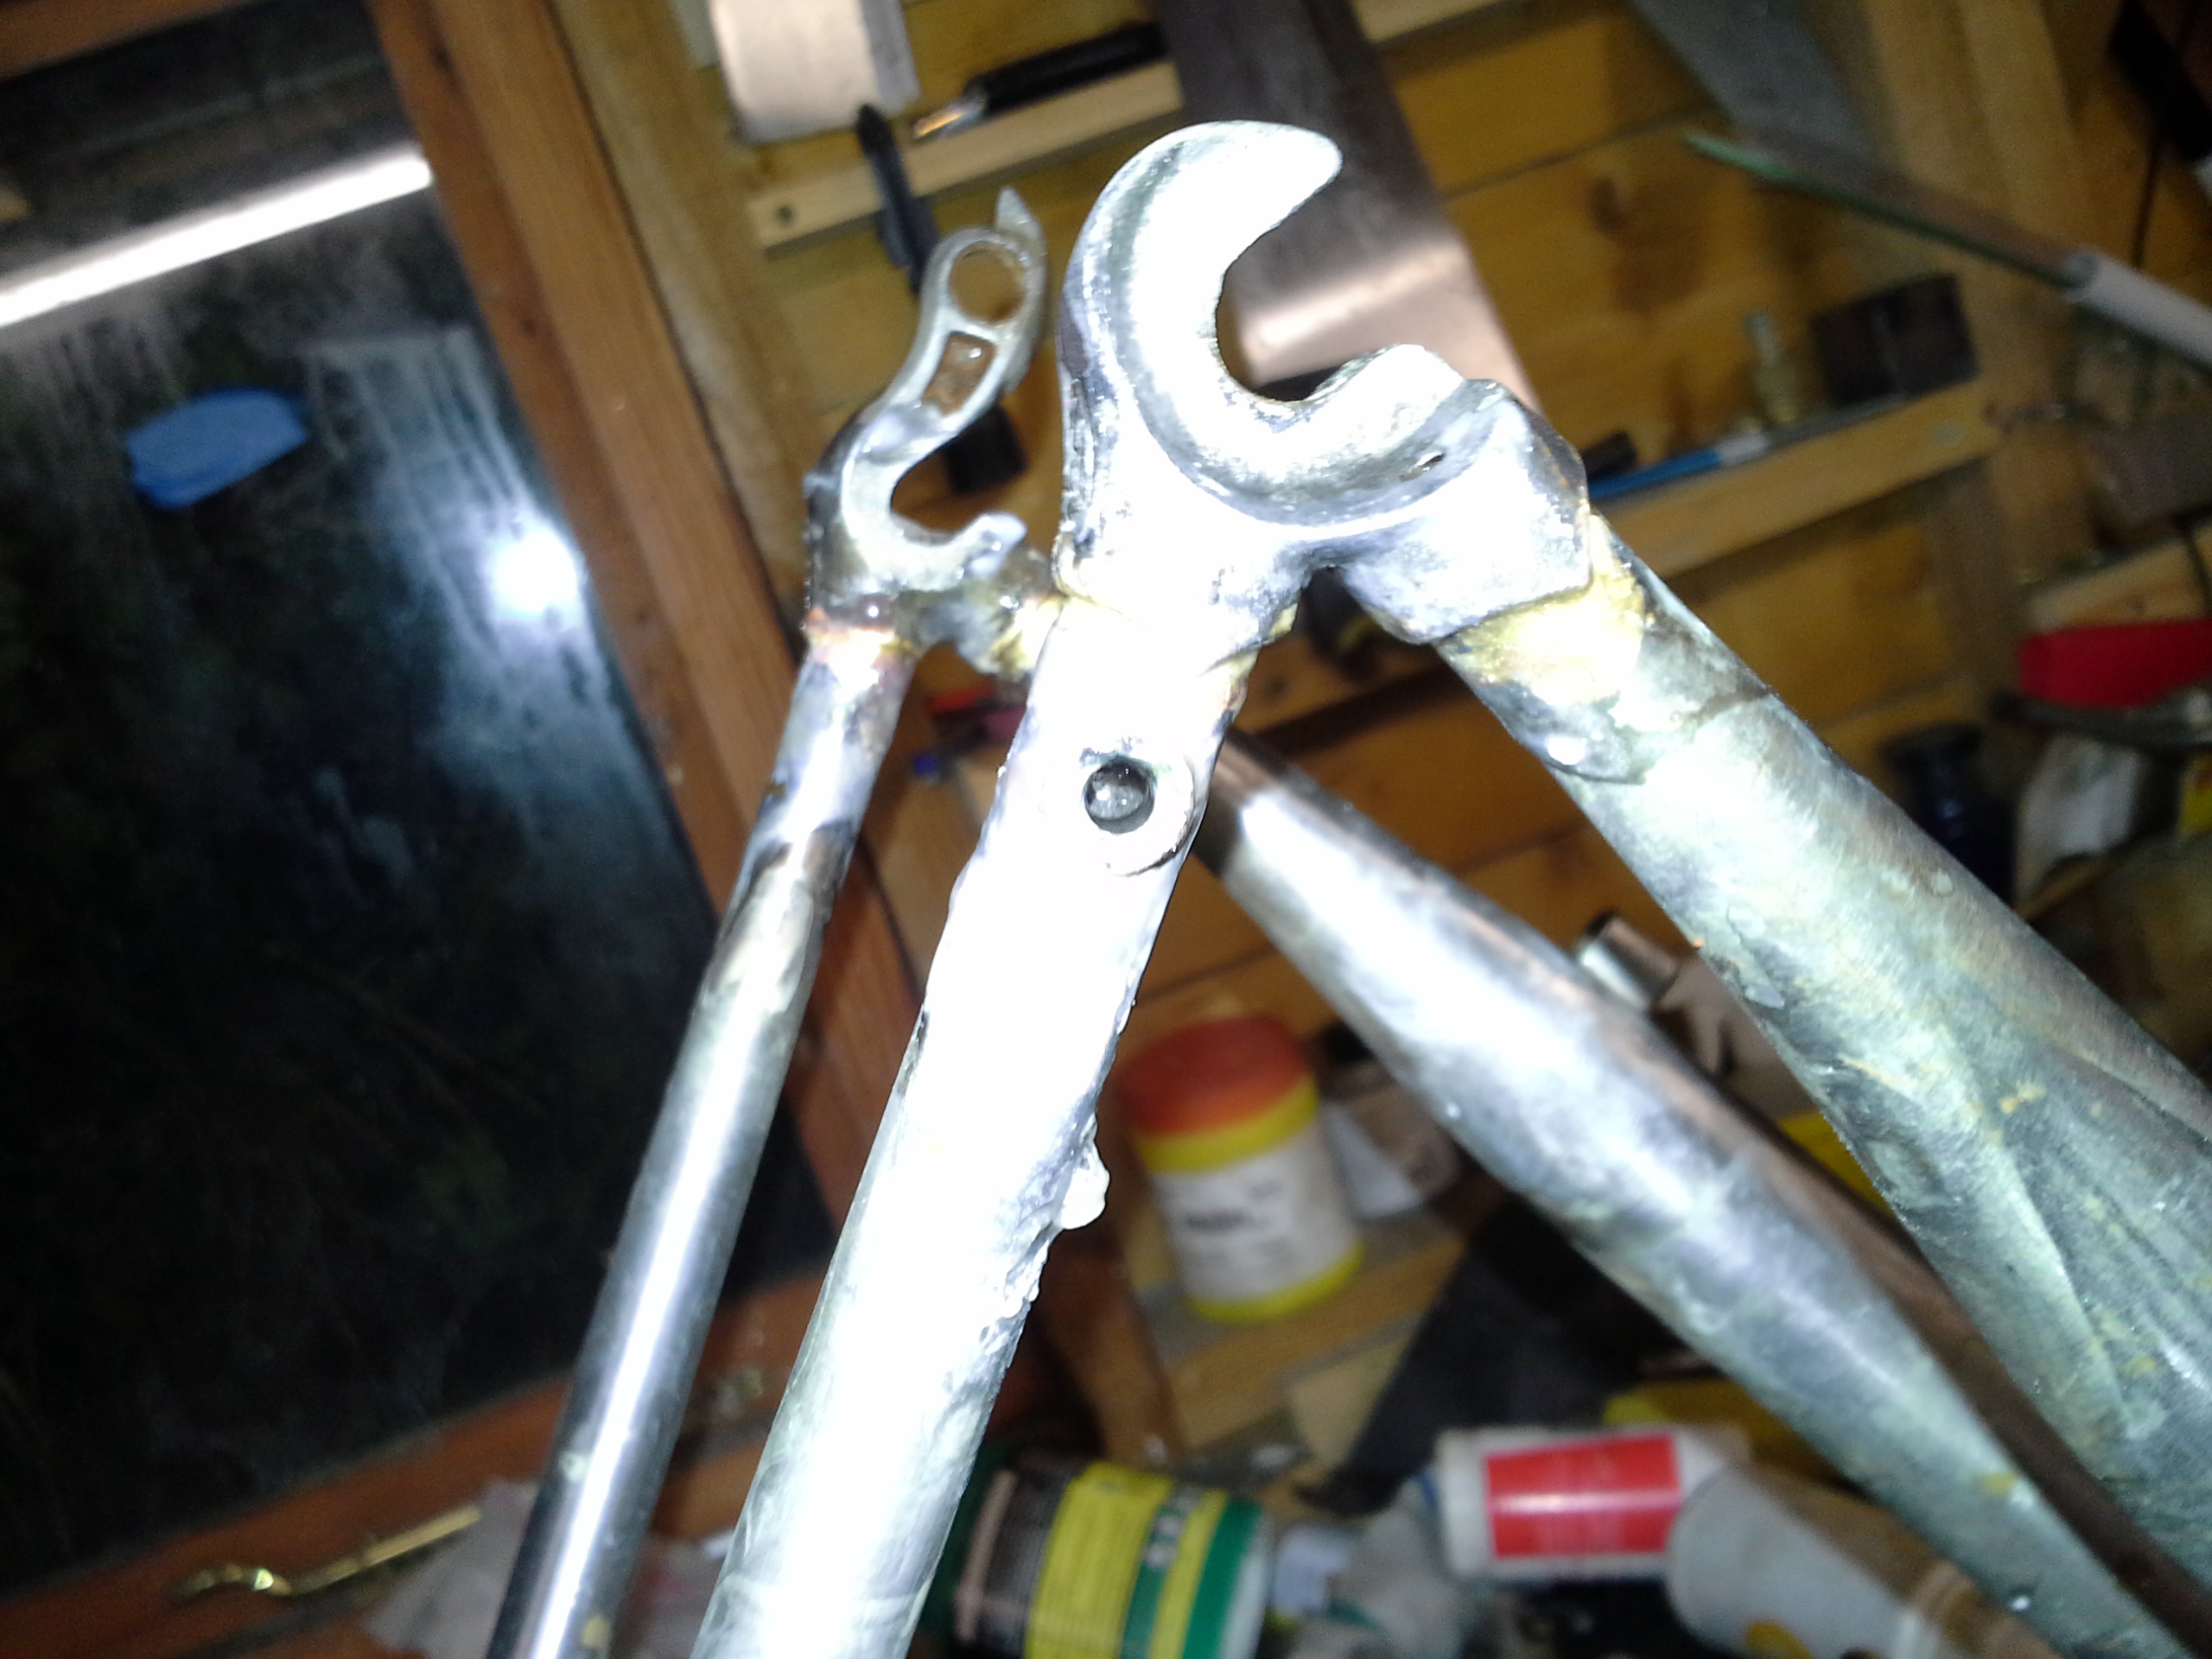
Chains stays are in so it time to hand mitre the seat stays.

Then is time to fit them and one last check with the dummy wheel. We then pop the dummy wheel out and drop a dummy axle which is a normal axle set to a 132mm so that it will come back to 130mm when it done.

flux and braze in both ends:

before i clean it up it best to check the dropouts with a tool:

you can add filler at the Bottom bracket to move the stays but since this is very close a qucik cold set. pullign on the handles to set it straight.

Perfect. loads of cleaning up to do then the brake bridge and brazons.
Right time to put the brake bridges in. Measuring from a frame with the correct brake height. Lots of filing and faffing to get this in. A quick check then braze it in.

The put the dummy wheel in to check. Great. It’s too low! Right start over. I decided to use a light weight bridge. Same all over again but a little higher. Small fillets just to fit the look of the frame.
pop a brake on to double check. I am trying to run it a little high up so there is room for the alloy mud guards. Job done.

Now on to Braze-on’s. I should have mentioned that is did the bottle braze on earlier as you have to drill the tubes before you assemble otherwise you can fit a drill in easily. So the next braze on are the STI stops. These you can put a long 5m bolt in and then use a welding magnet to hold them straight. Silver solder on these as the butts are short and the tubes are thin.
Cable stops, I use a welding wire clamps to hold them in place and a flat blade screwdriver to make sure they are straight. The bottom bracket cable runs. These you can use a plastic clip on. But I wanted to do some nice guides that we can then use plastic tube to keep the inner cables clean. These i bent to shape and filleted in with brass.

I have also made some tide bottle bosses into mudguard bosses by putting them at the bottom of the seat stay out the way.
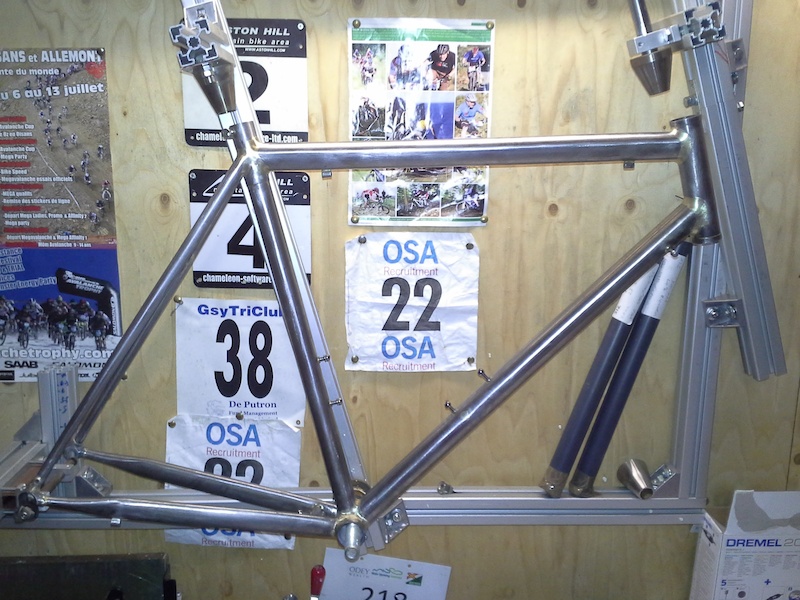
Nest is clean up detail, sanding the fillets by hand & reaming, honing and paint prep.
Right so the frame built. now it’s time to finish it. a few bits of handy kit required:

Useful tools include a adjustable reamer (set to 27.2) and a old seat post to check. A motorbike cylinder hone and drill. some rotary wire brushes. some strips of emery cloth, sand ceramic plumber tape. some Dremmel sanding wheels and a bottom bracket tap and a headtube reamer. so time to ream the head tube and bottom bracket:
Now it time to ream the seat tube until the seat post fits, then I run the cylinder hone down to make sure it wont scratch the new post.


Then check with the old post

Now for the paint staking hours of sanding and finishing. all signs of flux must be gone. all the joint must be smoothed and sanded. Using the emery cloth like dental floss on the join gets and nice finish:
Paint is on the way, carbon fork ordered and matching alloy mud guards are here.
Right a custom bike needs a custom paint job. Le Sportif has a lovely livery of a light green and pastel pink pallets with white font. So the frame as per the design needs to be Green. or specifically Hex 65BBA3 which has not RAL colour and the nearest Pantone is 3258C. But the bottom line is there is not off the shelf paint that works. I have tried ordering premixed paint for the UK but they were about £60 and now the post wont ship them because of the solvent. Nice.

So I have bought some Green, Blue, and red and will mix it by hand. I am using Inspire air bush paints as the pigment is strong they are easy to paint and cure quickly. I will use a 2k epoxy base to make sure they are well protected on the frame.
Its always good to do a test piece. So I have a test joint that I have white primed and done a single coat of test paint. I use a 3hp compressor with a lightweight tough up paint gun withe a moisture trap running at 60psi. It’s gone on well and looks a tad dry but they sometimes come out lighter when dry.

Nope so this needs a smidge more white in then wetting out read for painting.
So the paint test went well. now it’s time to progress the paint. First thing it to orders the decals required. I design them in photo shop then upload them to a website that prints the decals for you. there are some useful guys like gil@thecycleshed.co.uk who can do that for you if you want. I used sunny stickers .
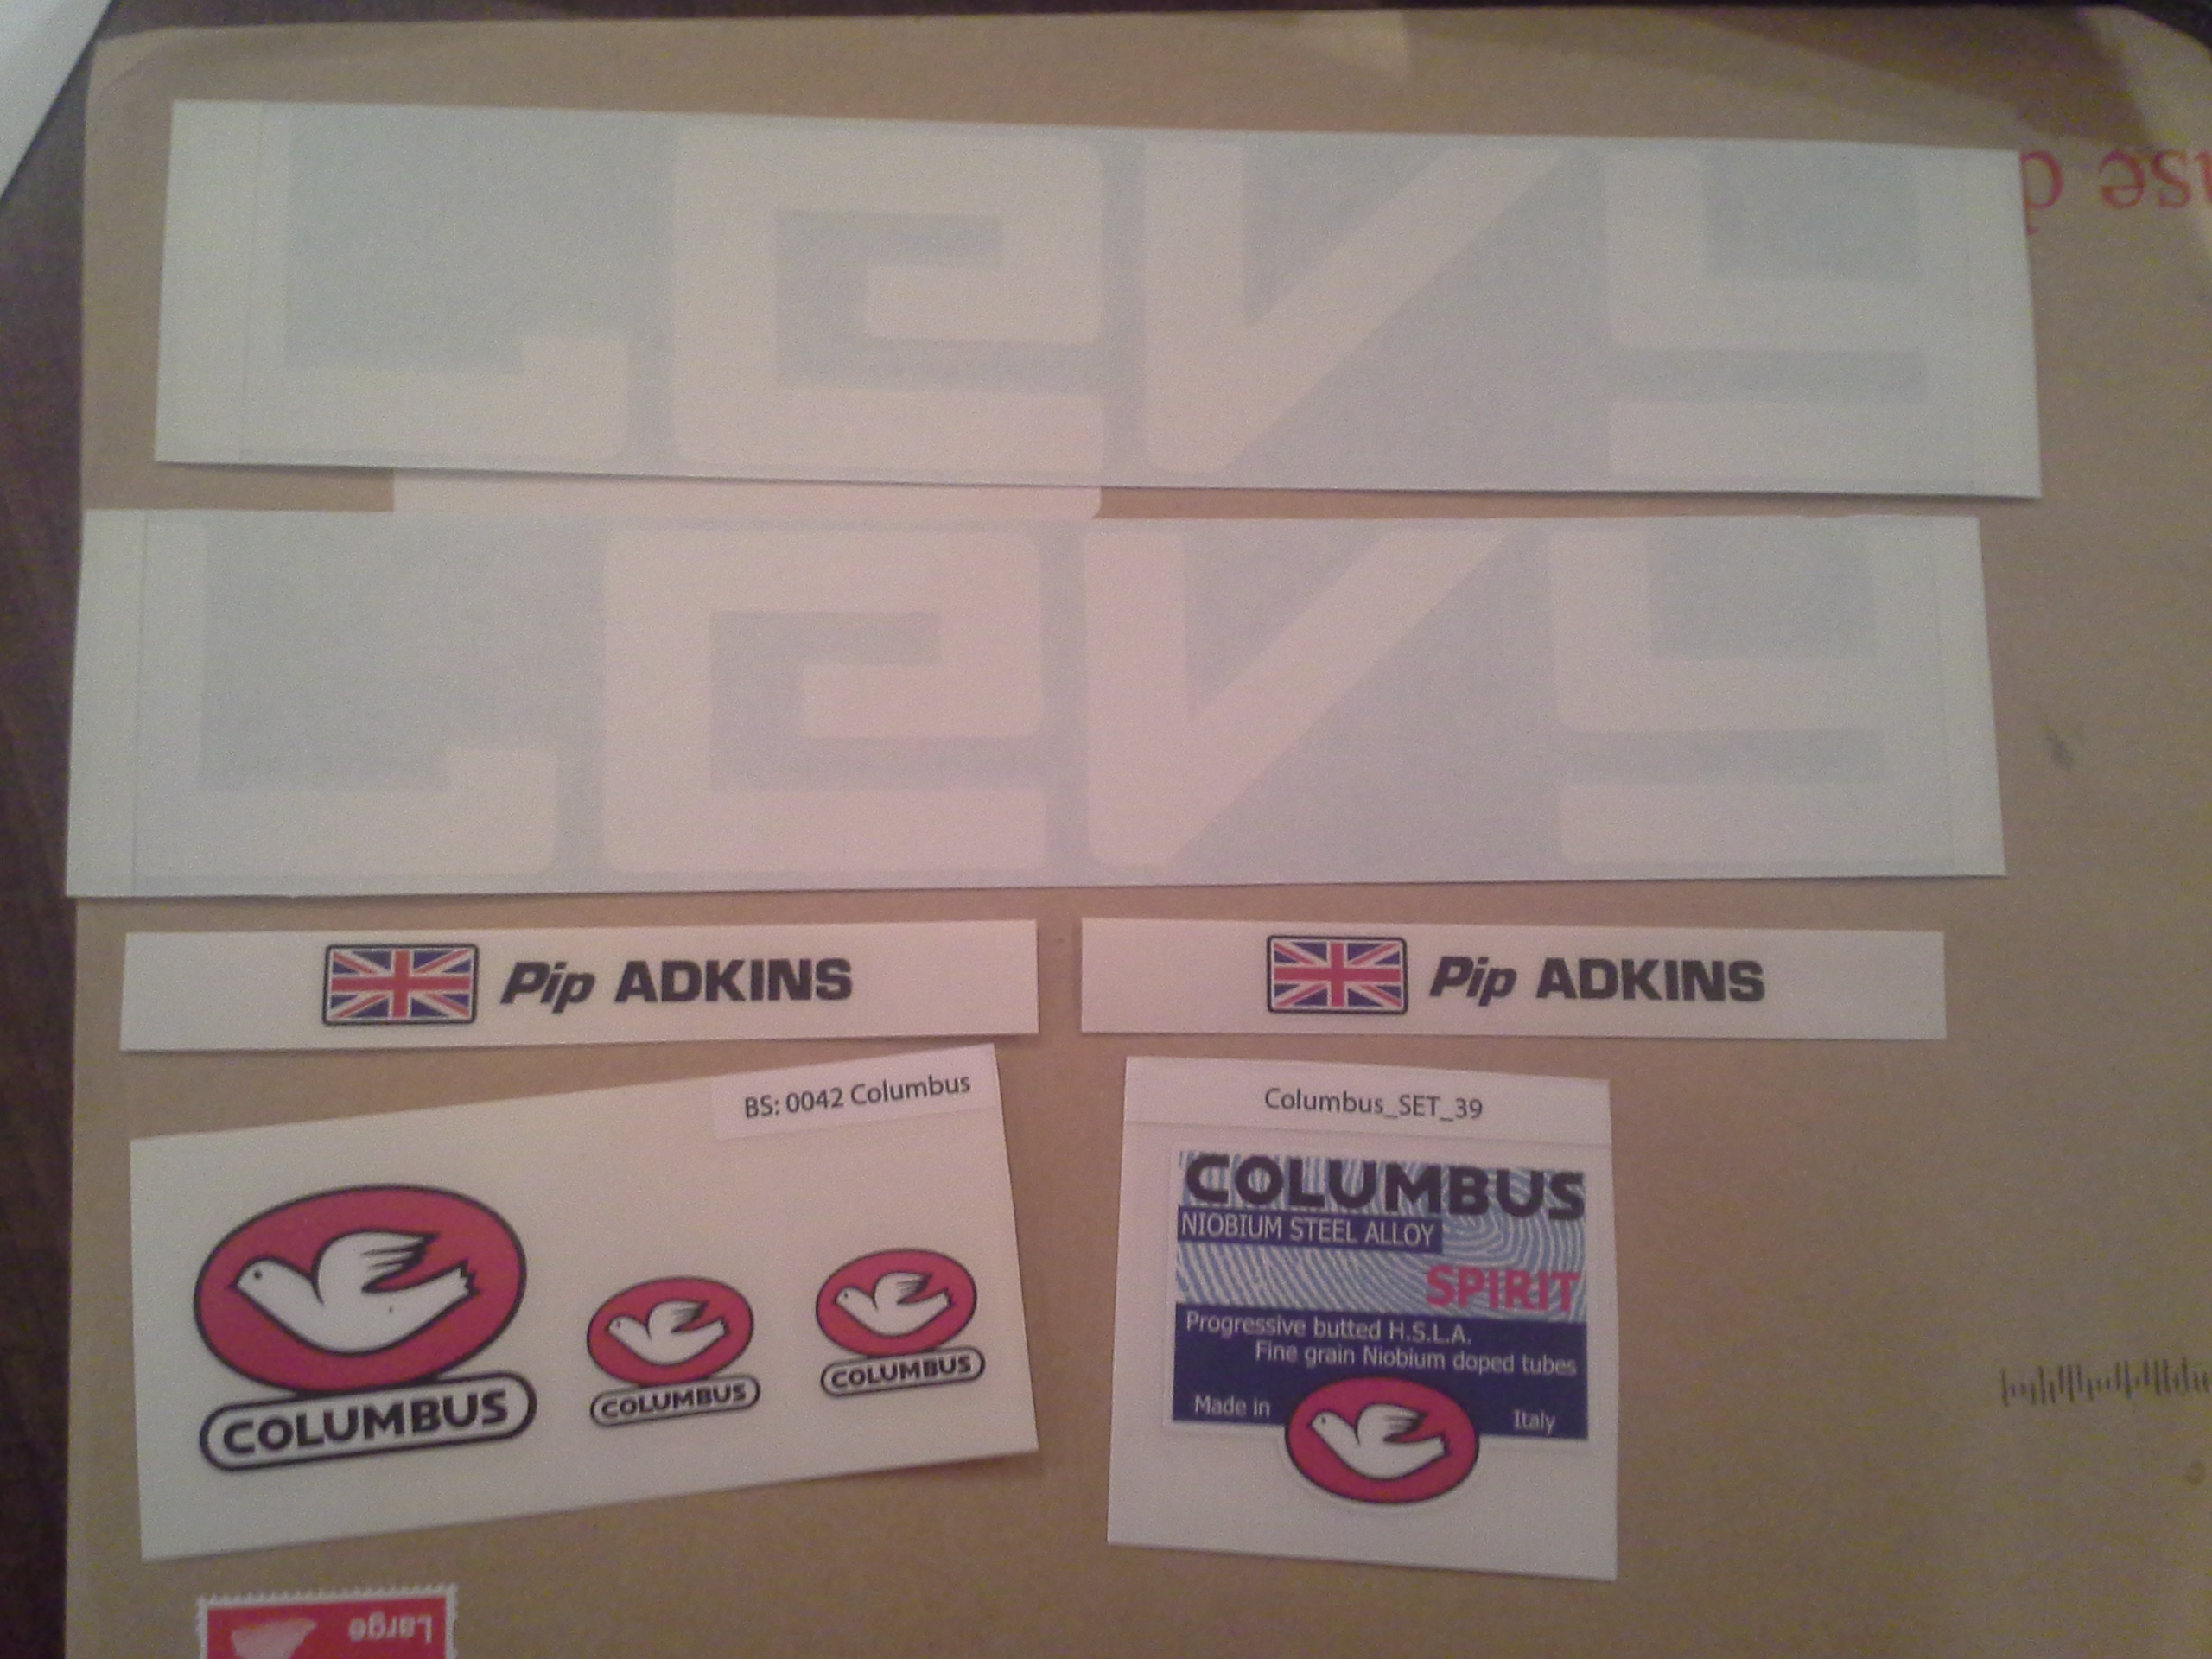
![]() The Headbadge decal is on its way and will be here by the time the paint is dry.
The Headbadge decal is on its way and will be here by the time the paint is dry.
Before you paint make sure you have enough space. indoors is better and you needs to ensure no dust and good temperature of 18-20 degrees c. I am using a 3hp compressor with a water trap and high pressure low volume air gun like you would use for car paint touch ups. Make sure you have solvent ready to clean the gun before you start. Before you put any paint down make sure you have inspected the frame. blank of any threads you don’t want pain on then key it by sanding with a fine paper all over. and wipe it down the solvent (isoprop alcohol with do or paint solvent), i use a seat pin clamped into a park stand to hold it. I am using a 1k primer wetted out with solvent to a skimmed milk consistency, mix thoroughly a load the gun. then it time to paint with long light strokes until the frame is covered. i like to dust it a few time until here is enough paint to make a smooth surface, go to fare and you get a run. Aim at the hard areas first like dropout , bb and seat tube. You should end up with a fine white surface all over. leave to cure in a warm place (airing cupboards are perfect).
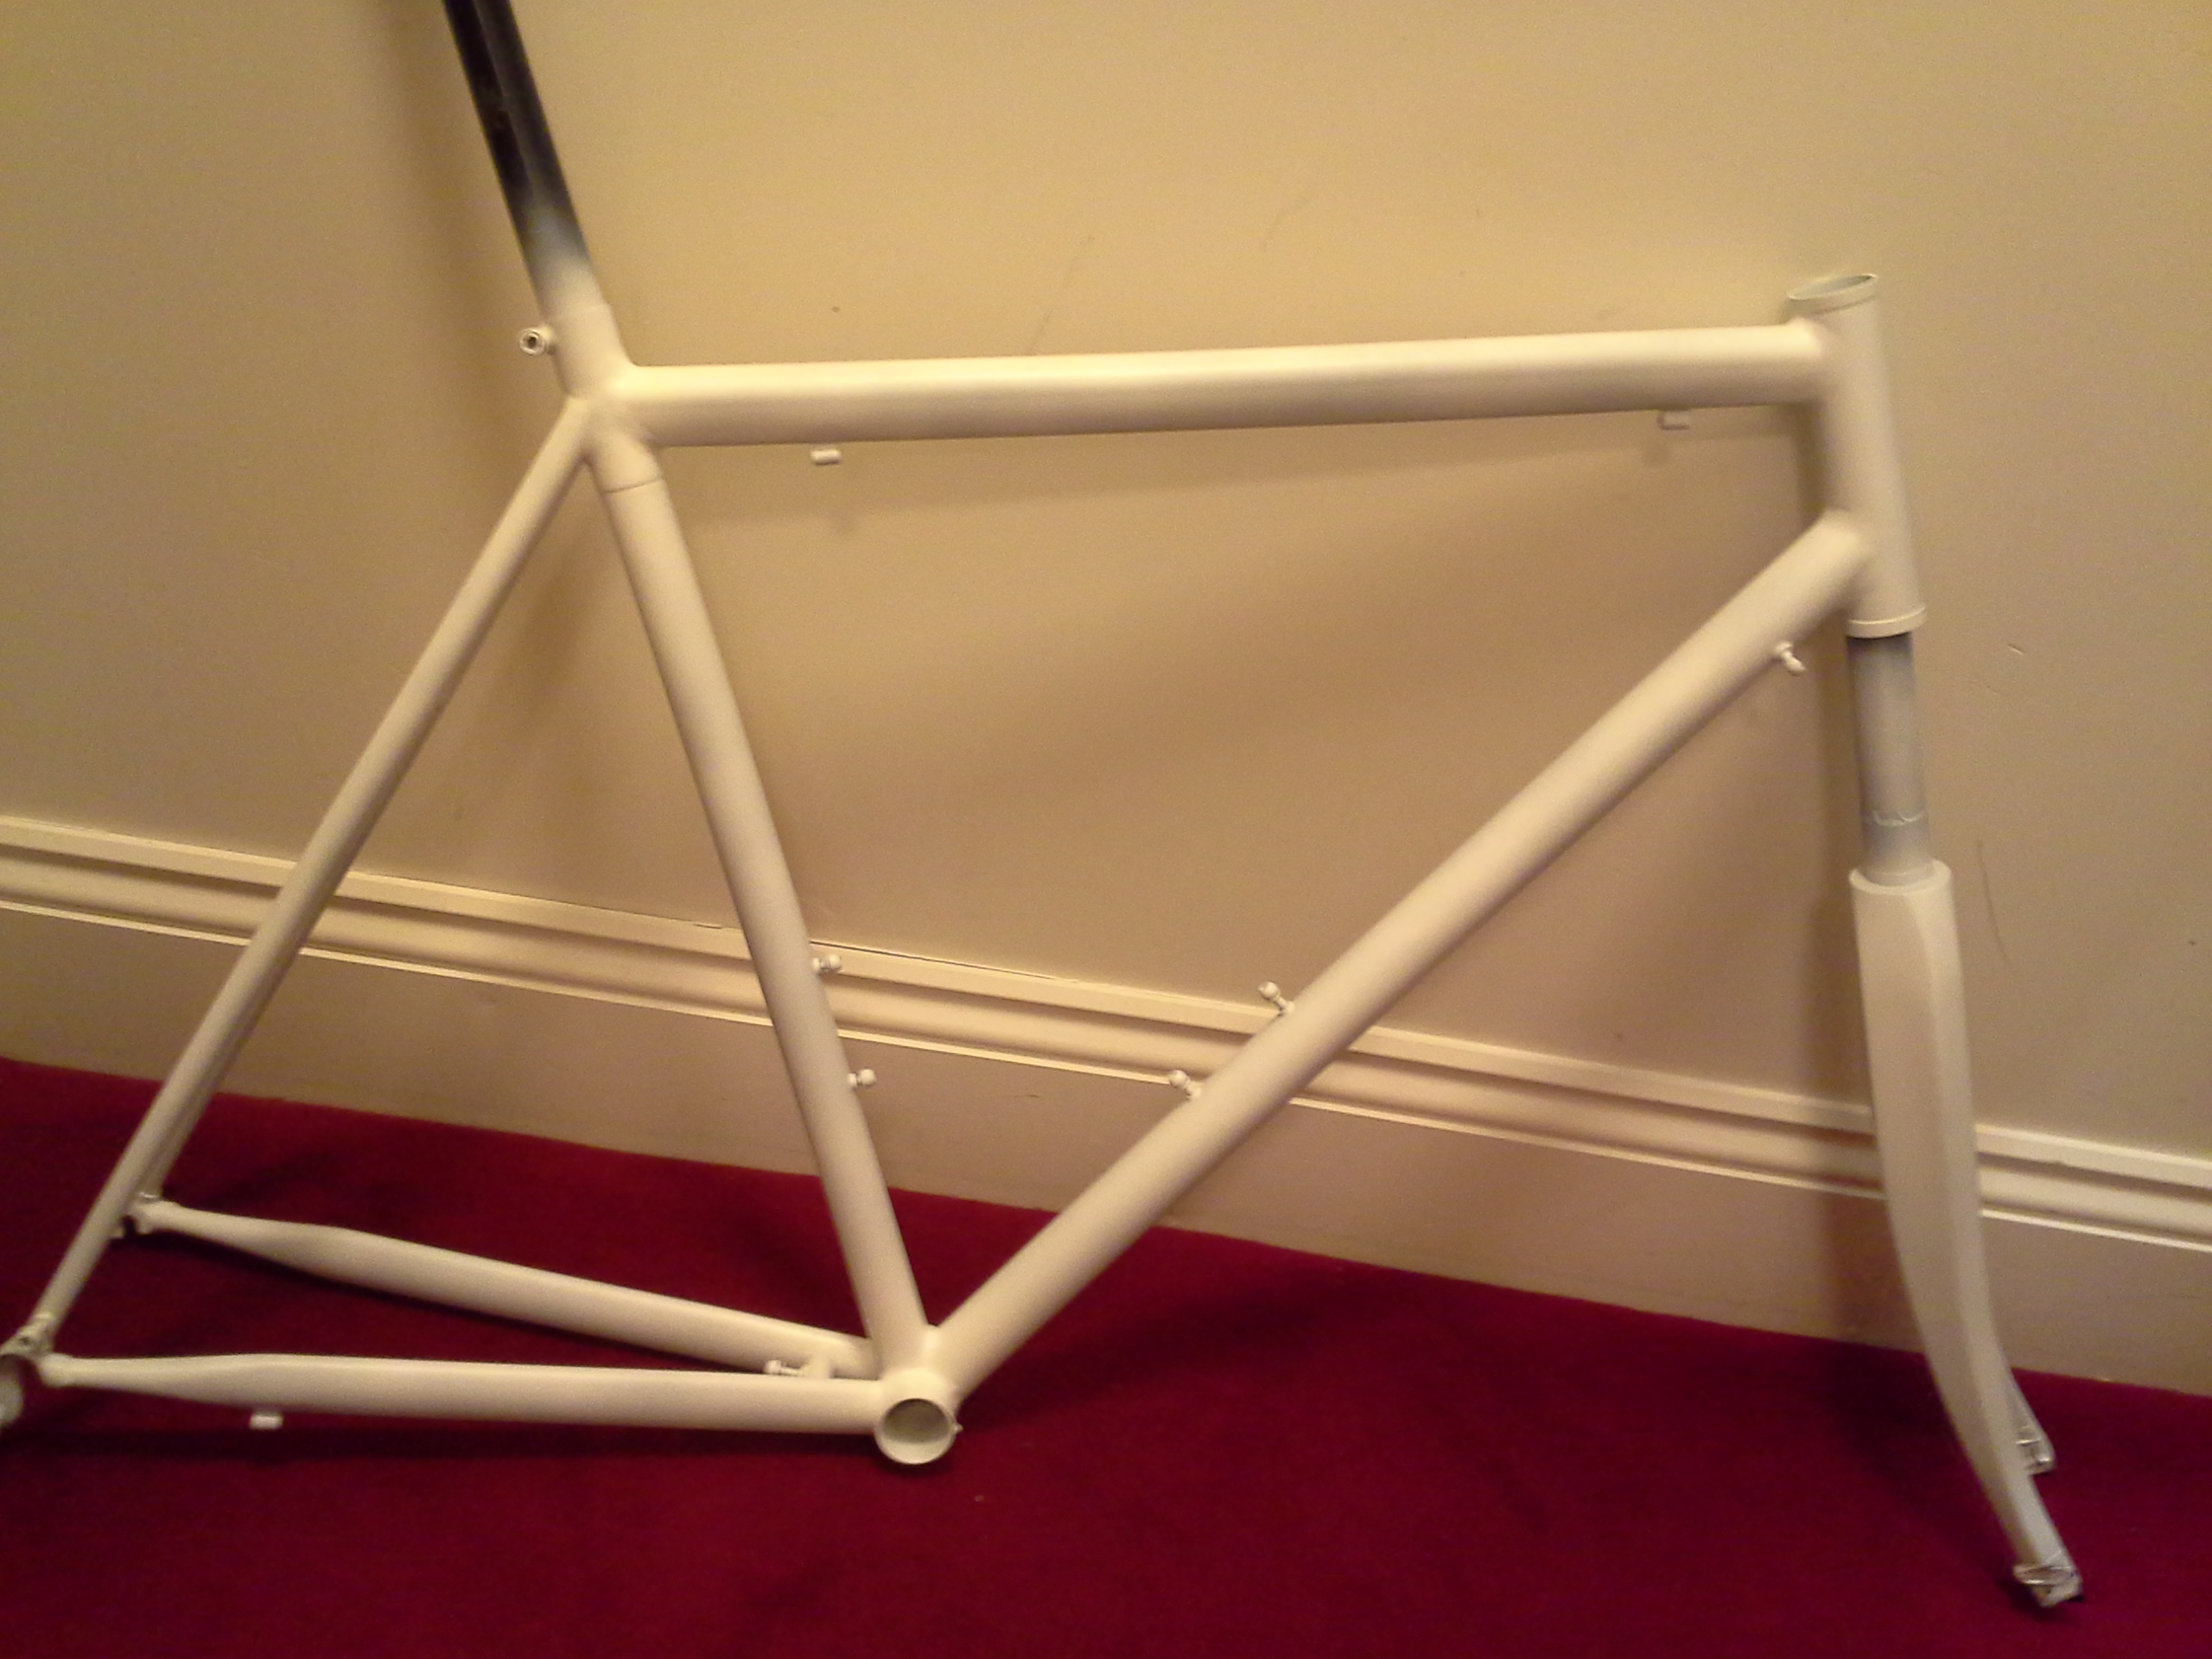 once that’s gone off we can then lay some paint down.
Right time to get some colour put down, which is my favorite part. So the frame has been white primed and lights smoothed down. the compressor set to 70psi, the paint wetted out 50/50 with thinners. rooms is warm @ 20+ degrees (3x garden patio eleci heaters going). time to lay down some paint in long strokes. just dusting then filling out with a few passes. the pigment is really strong so you don’t need to put it down thick. 15 mins standing time then one more light pass.
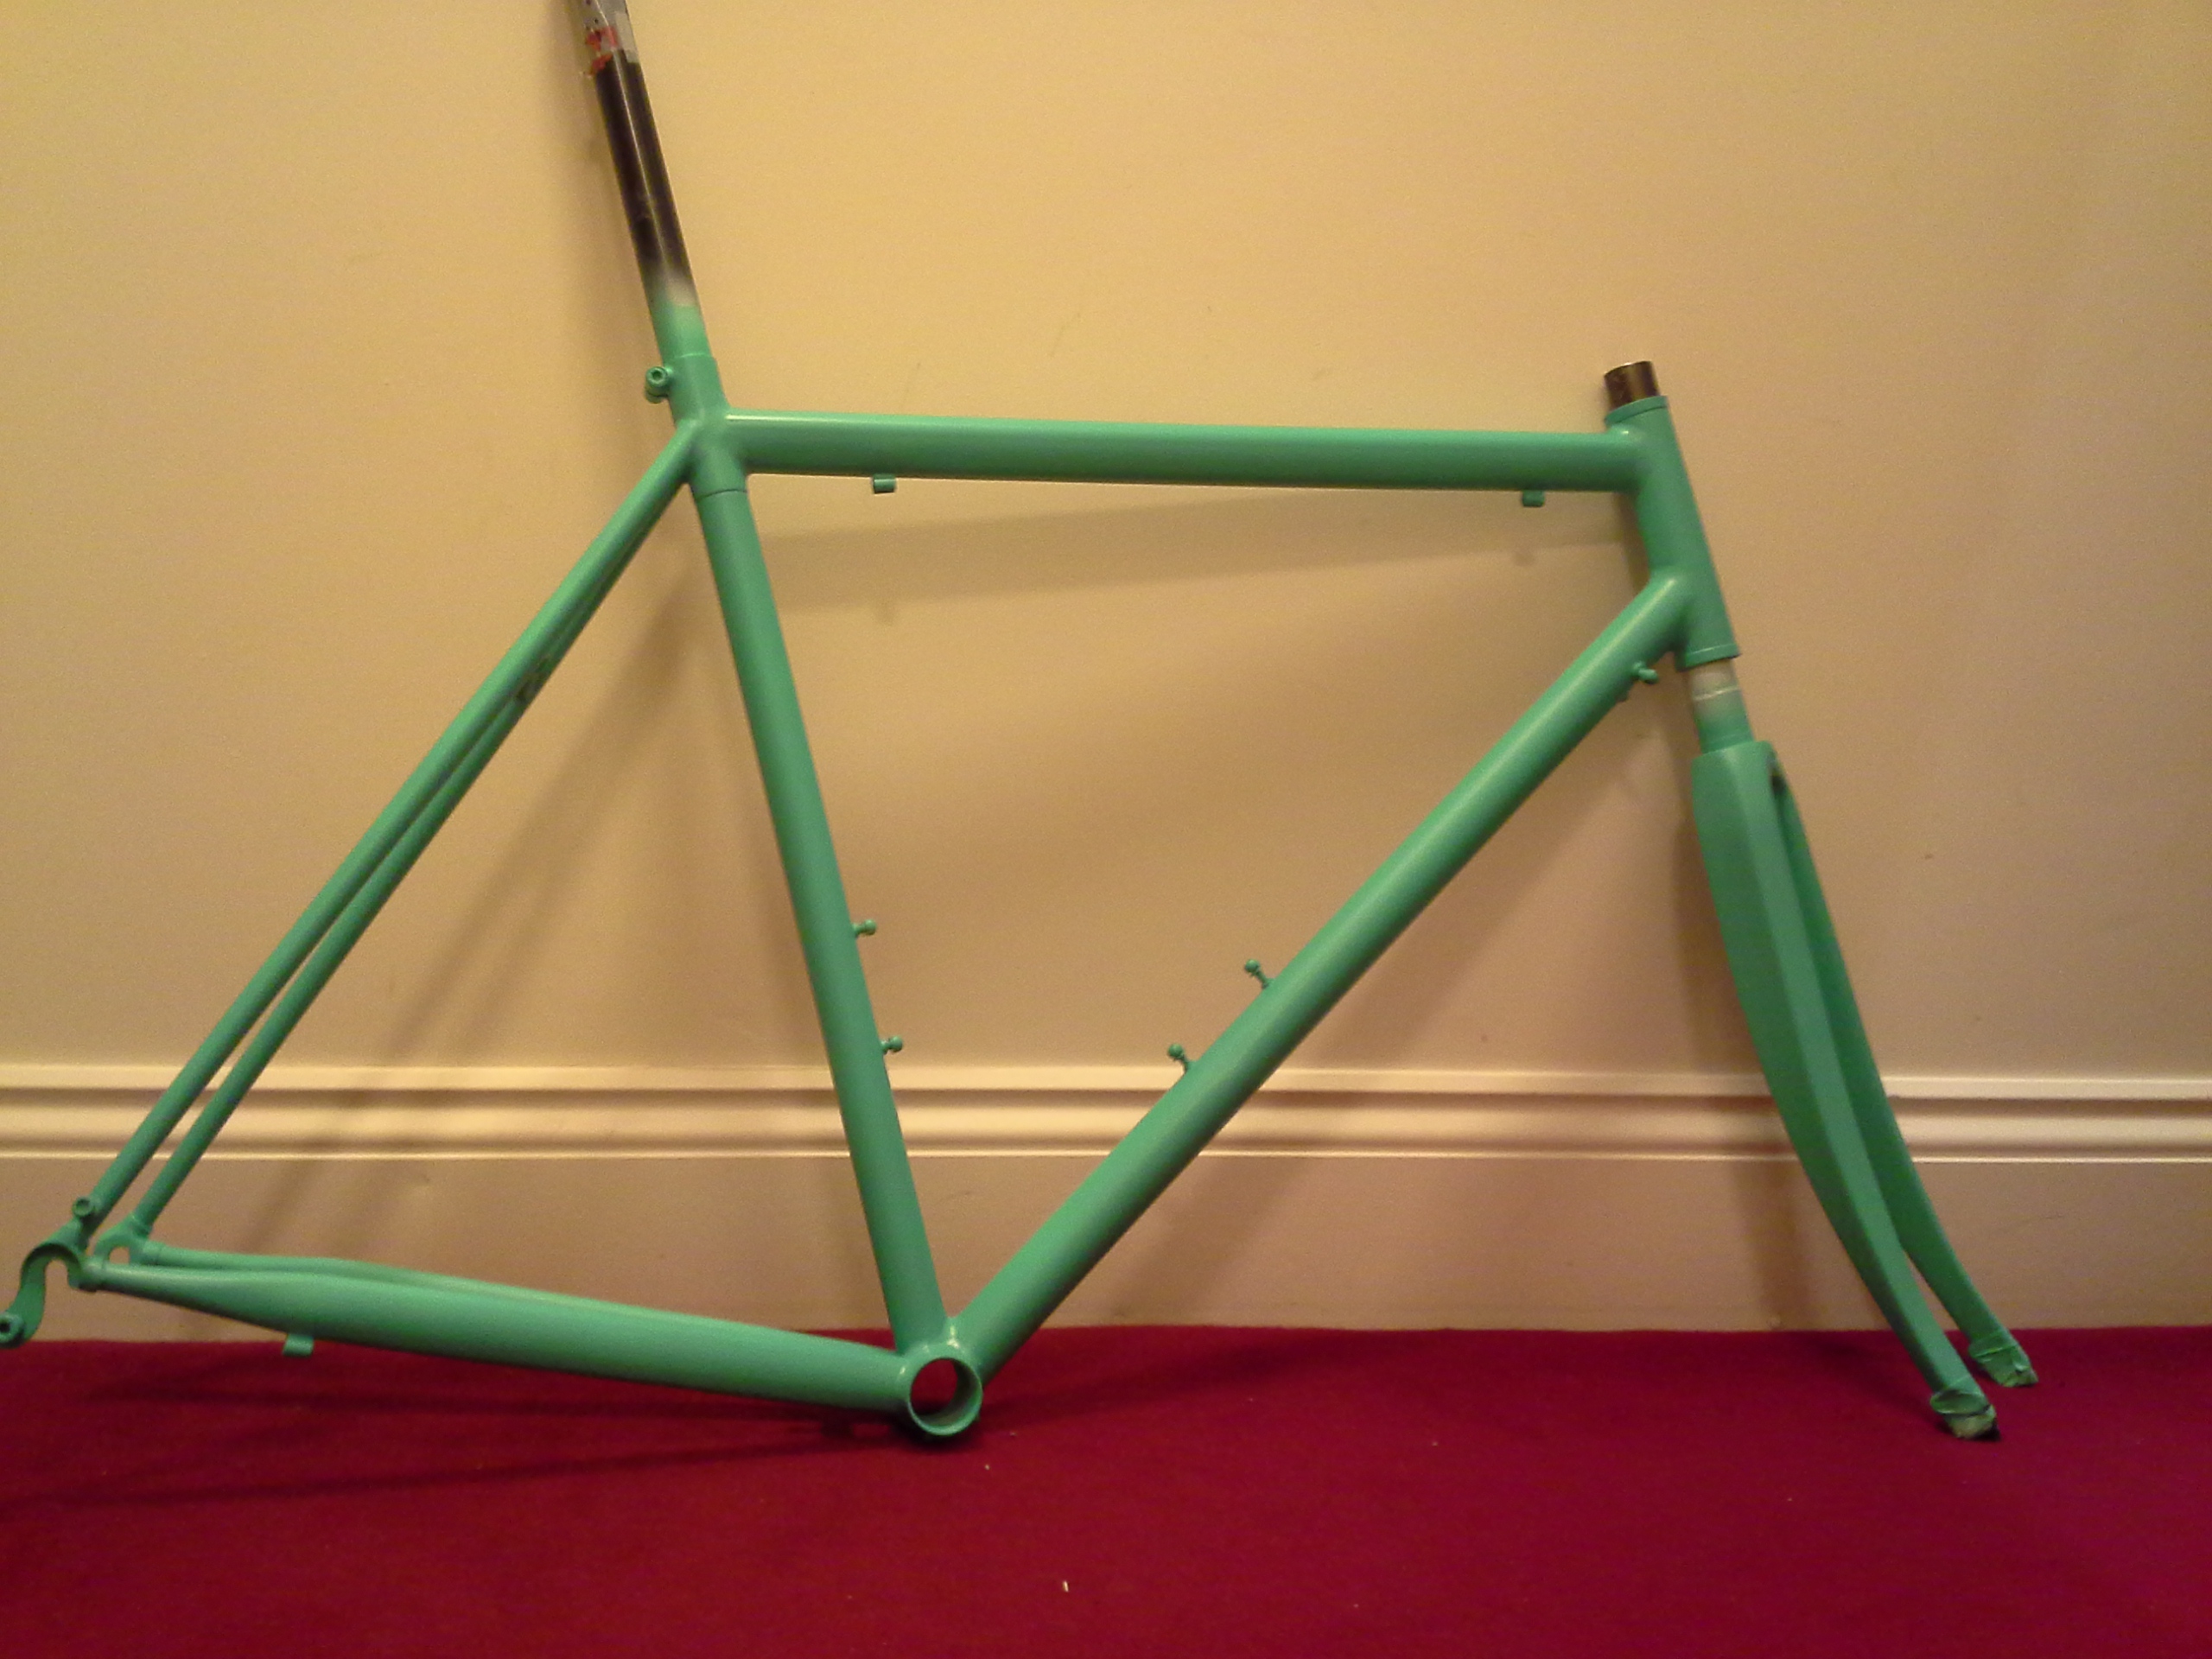
This needs to dry for 8 hours then we can put the decals on. peal the backing off and align carefully in one direction pushing any bubbles out. Rub the covering to make sure a goods bond then peal off carefully making sure no edges lift. then lay down the opposing decal making sure it lines up end to end.
so it’s beginning to look like the final item. next will be a 2k top coat and then reaming at tapping the frame.
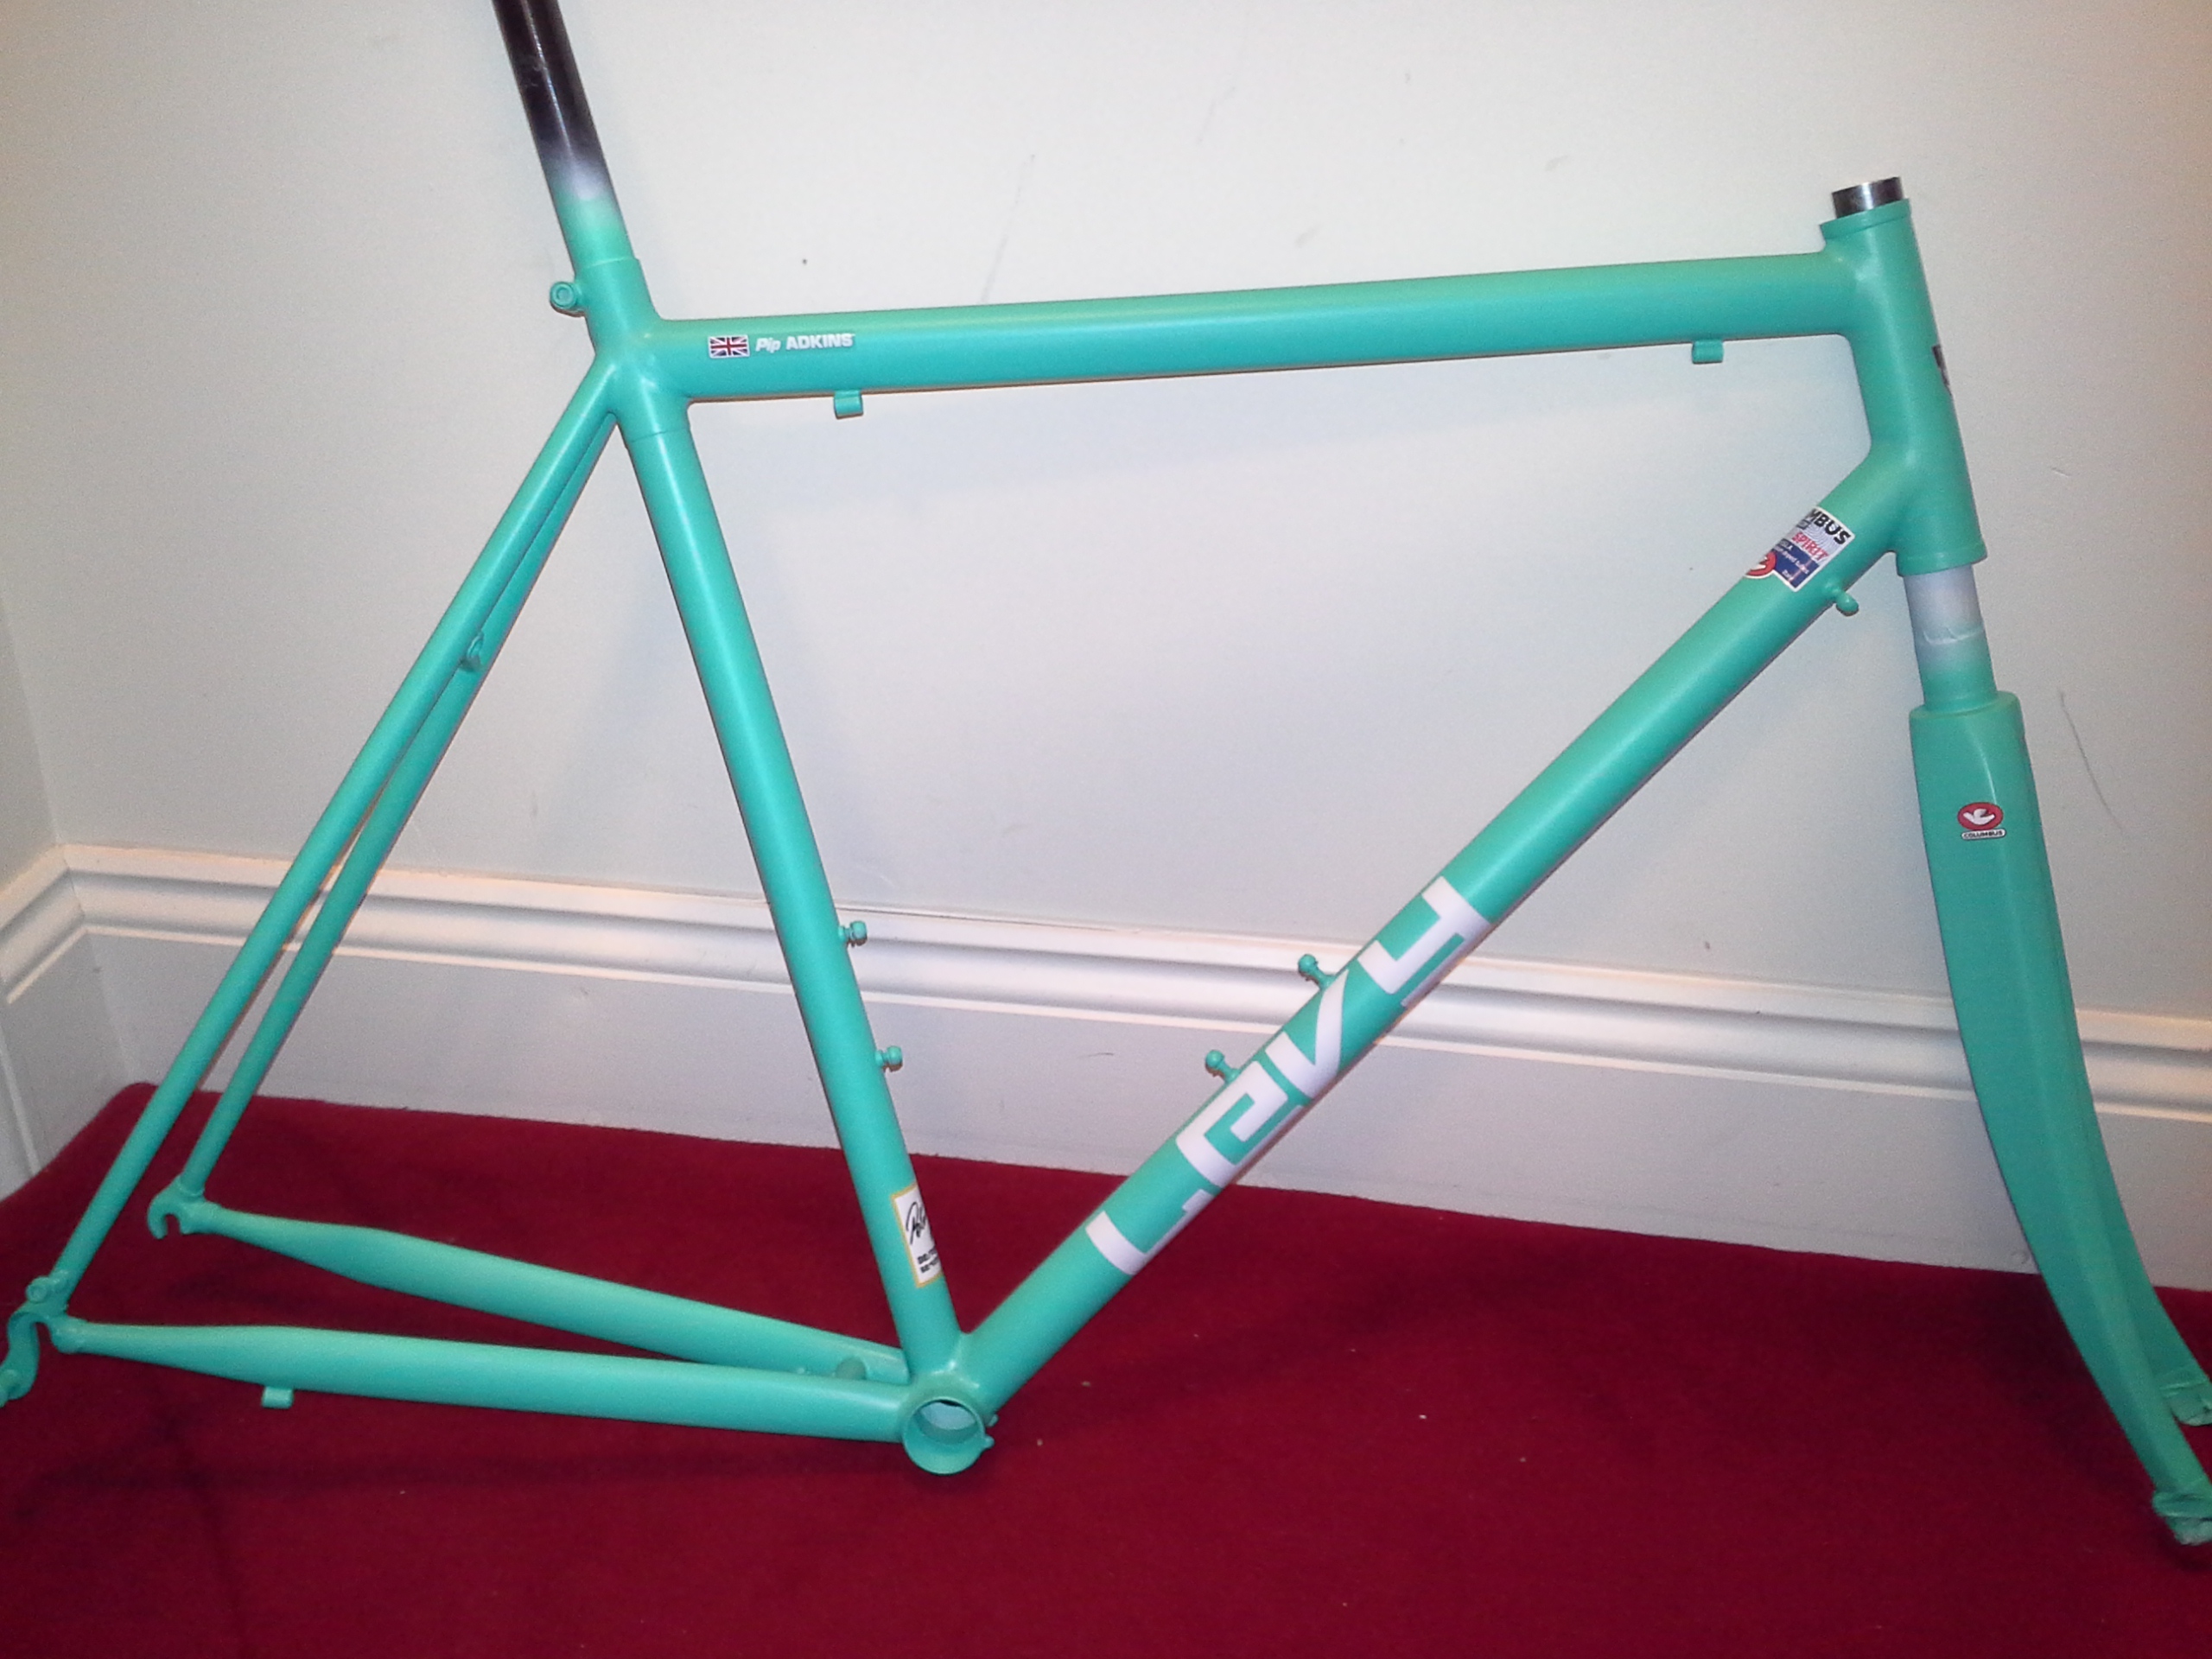
The colour coat has dried. The decals are on so its ready to go for a top coat. I like to use a 2K top coat n(u-pol 2:1) as it tough and give a good looking finish. Wetted out a bit to make sure it goes on okay. needs to be warm so I have the heaters in the room. One light coat then one full top coat with 15 min in between. Heater on for 3 hours then in the airing cupboard for 24 hours.

A quick cut on polish then it’s time to take out all the blanker bolts, tap them and ream the BB and headset. The some frame saver inside the frame so it does not corrode. Some nice customer green bolts. A quick photo then time to pack it up to send it to its new home.


December 1, 2015 at 12:38 am
I am working on a couple of frames right now that have 36 mm diameter headtubes. Am using a 1 7/16″ hole saw to notch the tubes and it is bang on. Pretty freaking cheap too. Tried a 1 3/8″ and found it a little tiny.